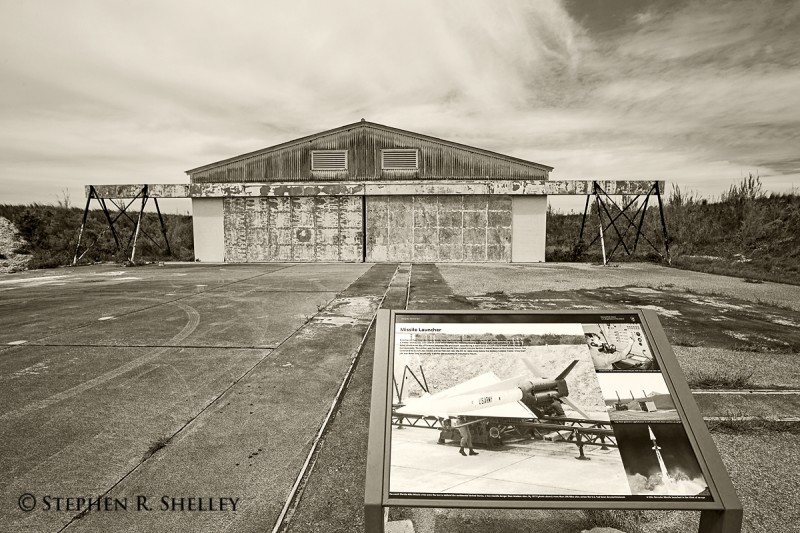
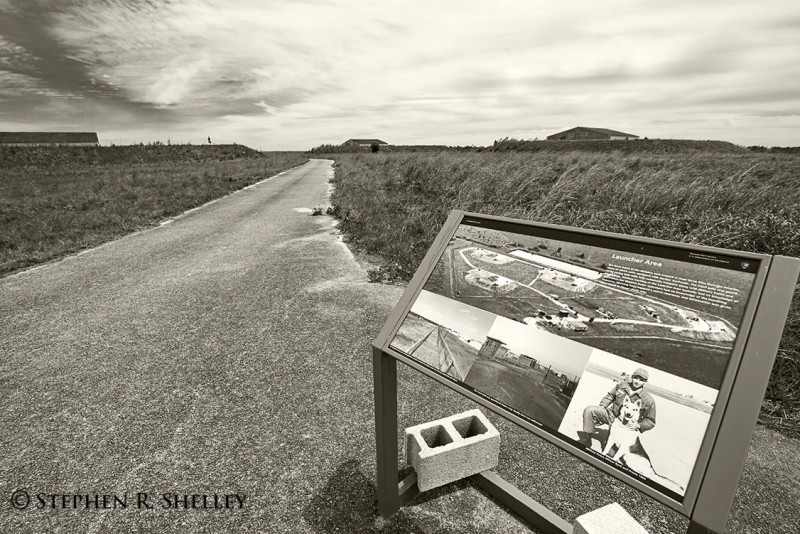
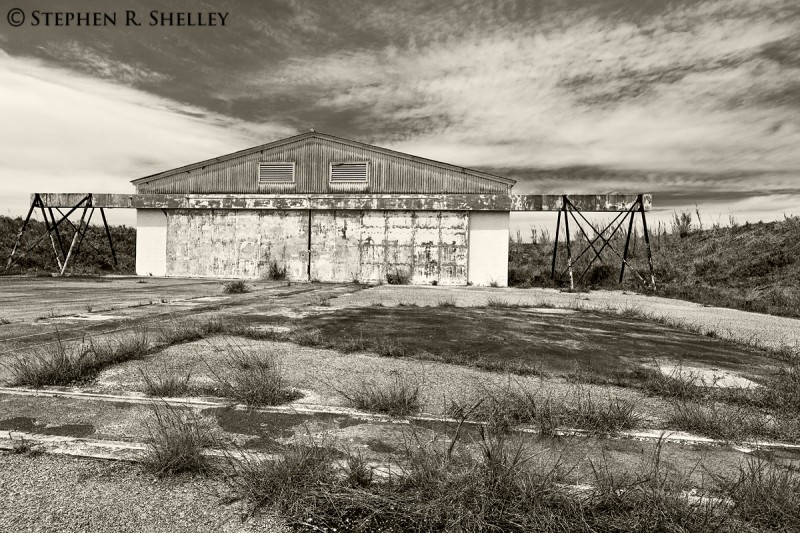
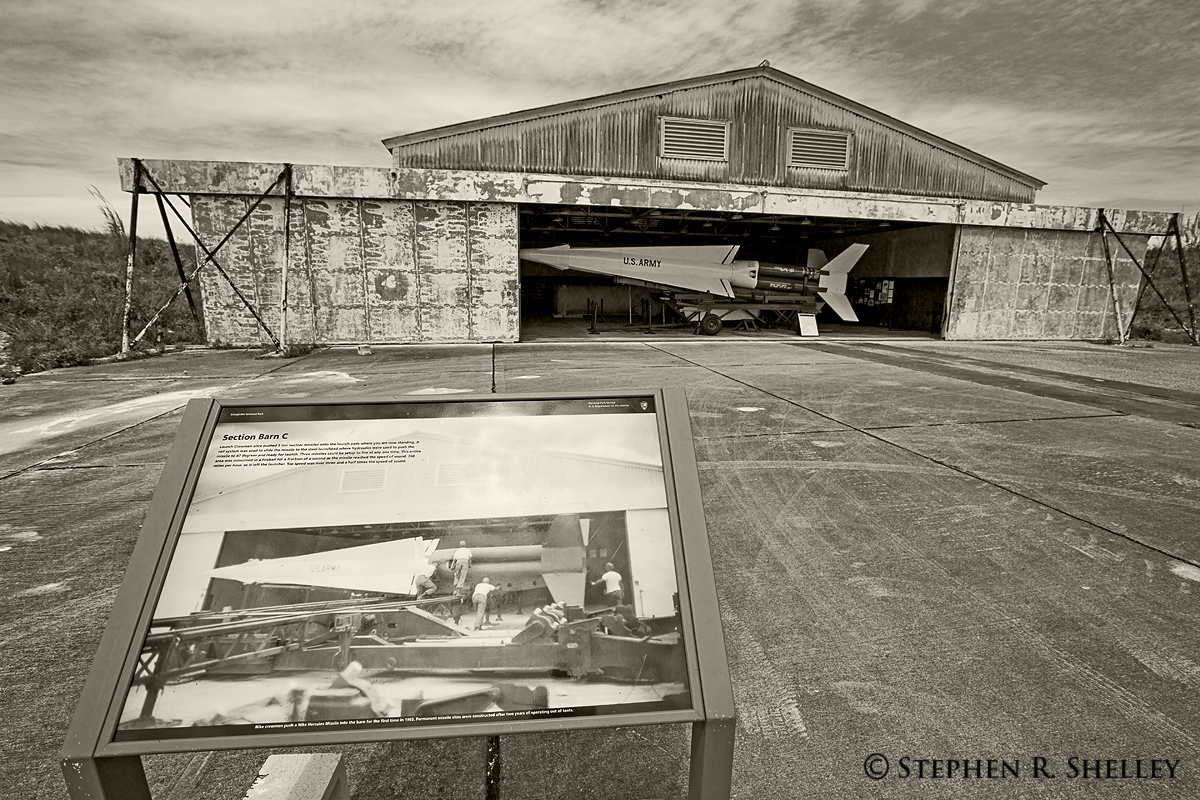
This past Saturday I had the opportunity to tag along with the South Florida National Parks Camera Club to take a tour of the Nike Missile Base located in Everglades National Park. The Nike Missile Base, HM-69, is no longer in operation and has been declared an historic site. The base was constructed in 1962 to help defend the United States from an attack from Russia during the Cuban Missile Crises. The base closed in 1979.
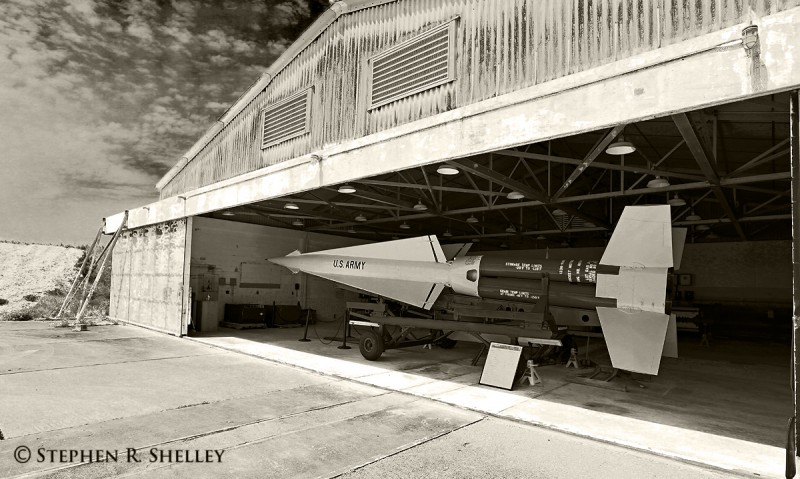
Everglades National Park offers tours of the site from December through April. There is a fully assembled restored Nike Missile on site within one of the missile silos.
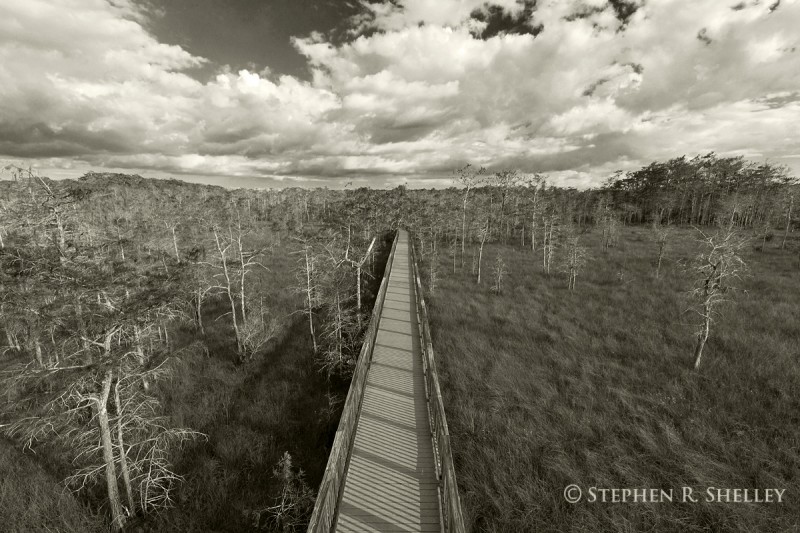
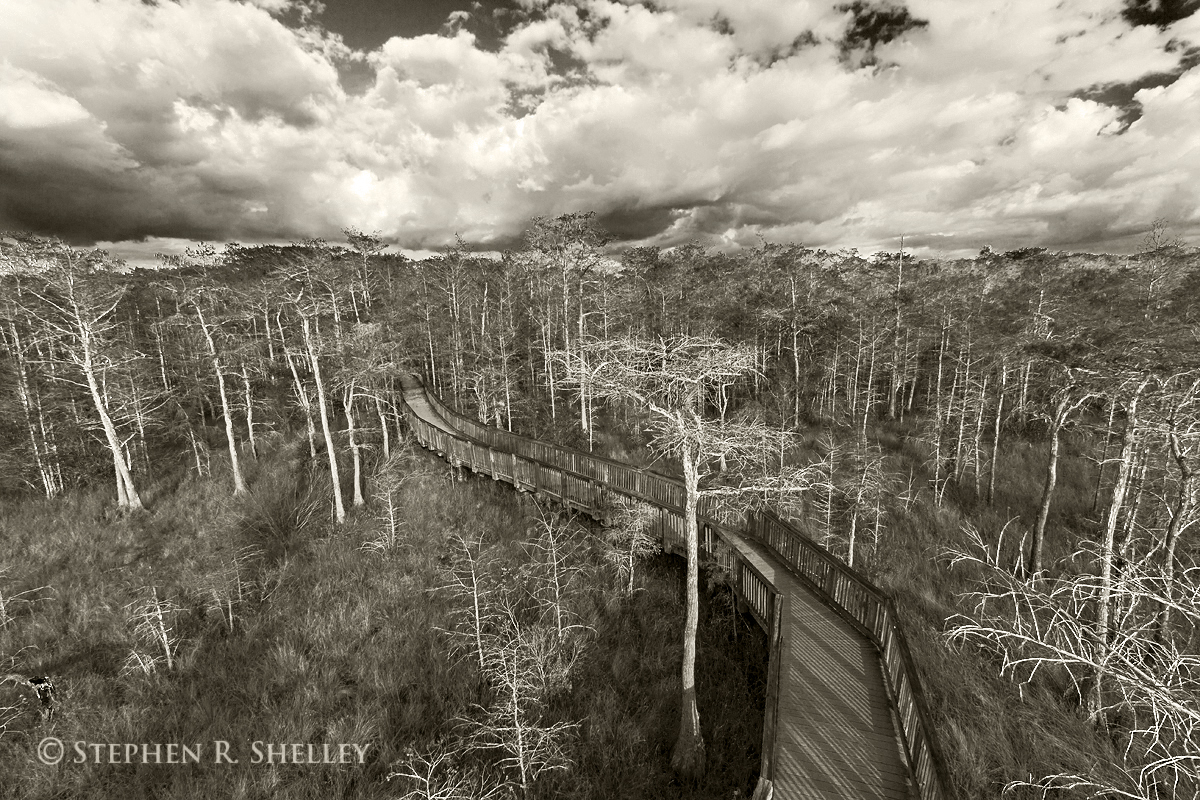
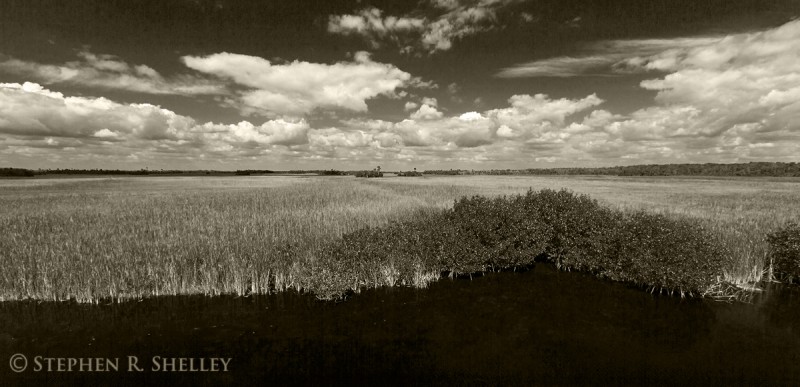
I decided to process the photos in black and white to reinforce the historic nature of the location. Also, I was there in very harsh noon time sunlight causing high contrast between the dark and light areas which yields a more pleasing look in black and white than it does in color.
I highly recommend the tour next time you visit Everglades National Park.
Long exposure daytime photography has always been a technique that I have wanted to add to my bag of tricks. Unfortunately, I always found the price of a 10 Stop Nuetral Density (ND) Filter to be cost prohibitive, especially considering I was not sure I would like the effects it produced or, that I could find enough situations to make the investment worthwhile. That was until I stumbled across a forum post about a brand of ND filter that was relatively low cost and still produced quality images. That brand was Haida.
Haida filters are made in China and are not carried by any photography retailer that I am familiar with either locally or online. The only way to purchase one of these filters is through ebay or amazon. After hours of researching and looking at sample images I decided to roll the dice and ordered one from Amazon.com for the low price of $88.00 shipped. All reviews and discussions had nothing but great things to say about the Haida Pro II 10 Stop Filter. To my surprise my filter arrived 3 days after I placed the order.
Prior to purchasing the Haida ND 10 Stop Filter, the two things I was most concerned about was color cast and the effect of the filter, if any, on image sharpness. I can report that neither is a problem. The Haida ND 10 Stop Filter produces very little if any color cast. Using the camera’s auto white balance may sometimes produce an ever so slight cool cast, but unless you compare an image taken with the filter with one taken without the filter side by side you would not notice any negative effect on the captured image. Any color cast/shift can easily be corrected with the temperature slider in Photoshop or other RAW image editor.
Some 10 stop ND filters produce a very strong color cast that causes the resulting image to be a hue of blue or tan depending on the brand of filter. Some filters create a stronger color cast than others. A strong color cast can be very difficult to remove in post processing and can render the filter useless for producing wall hanging images. Therefore, I am very happy that the Haida ND 10 Stop filter I purchased has virtually no color cast that is visible to the naked eye.
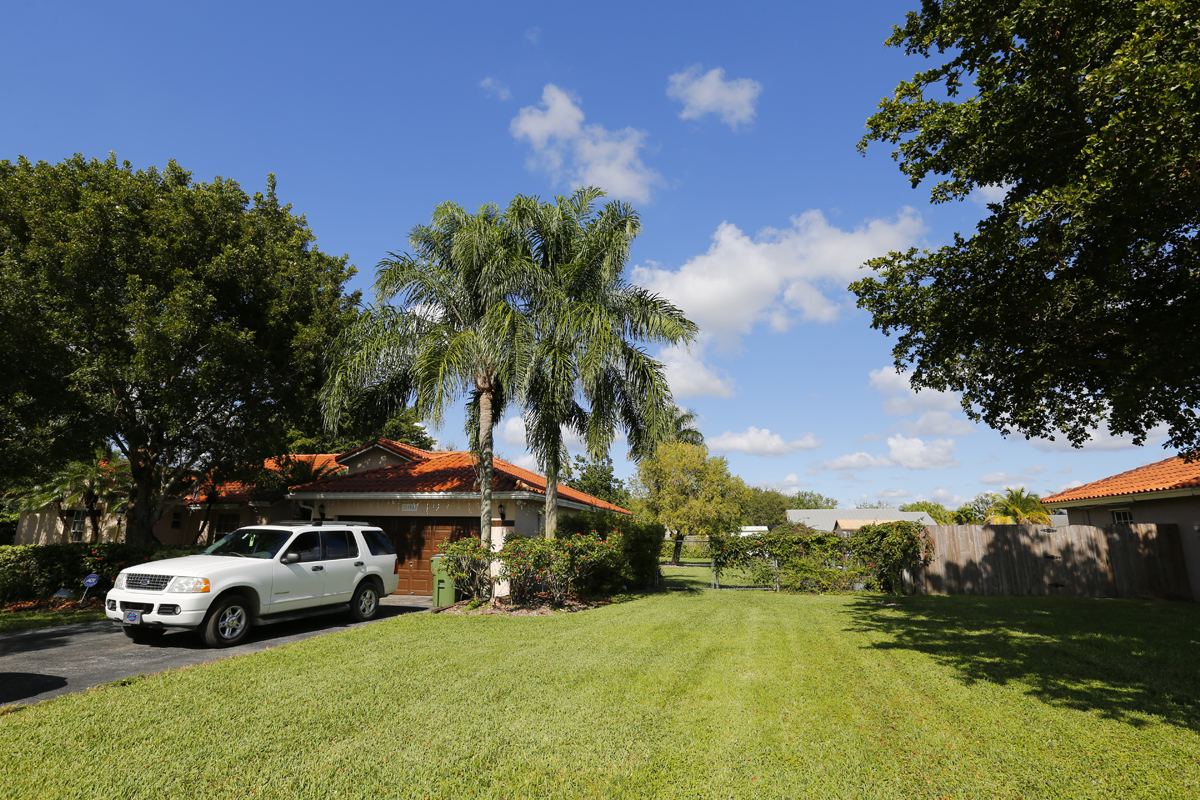
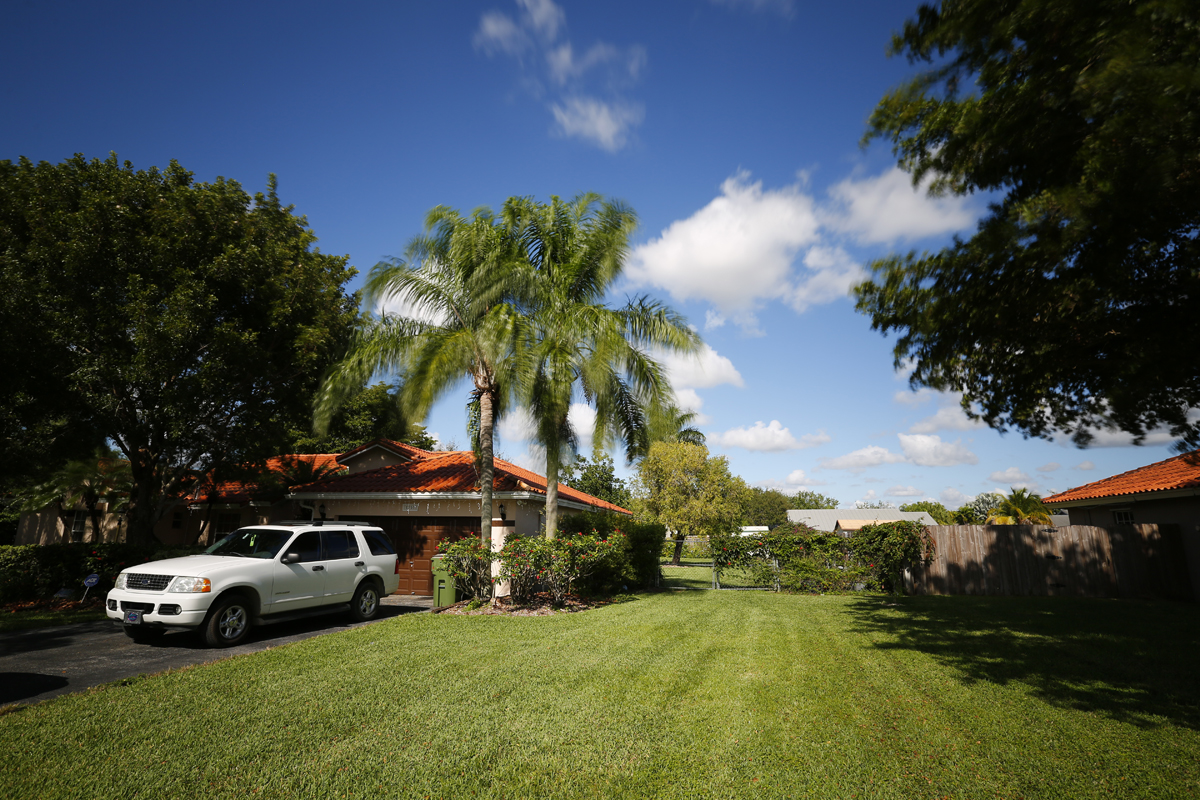
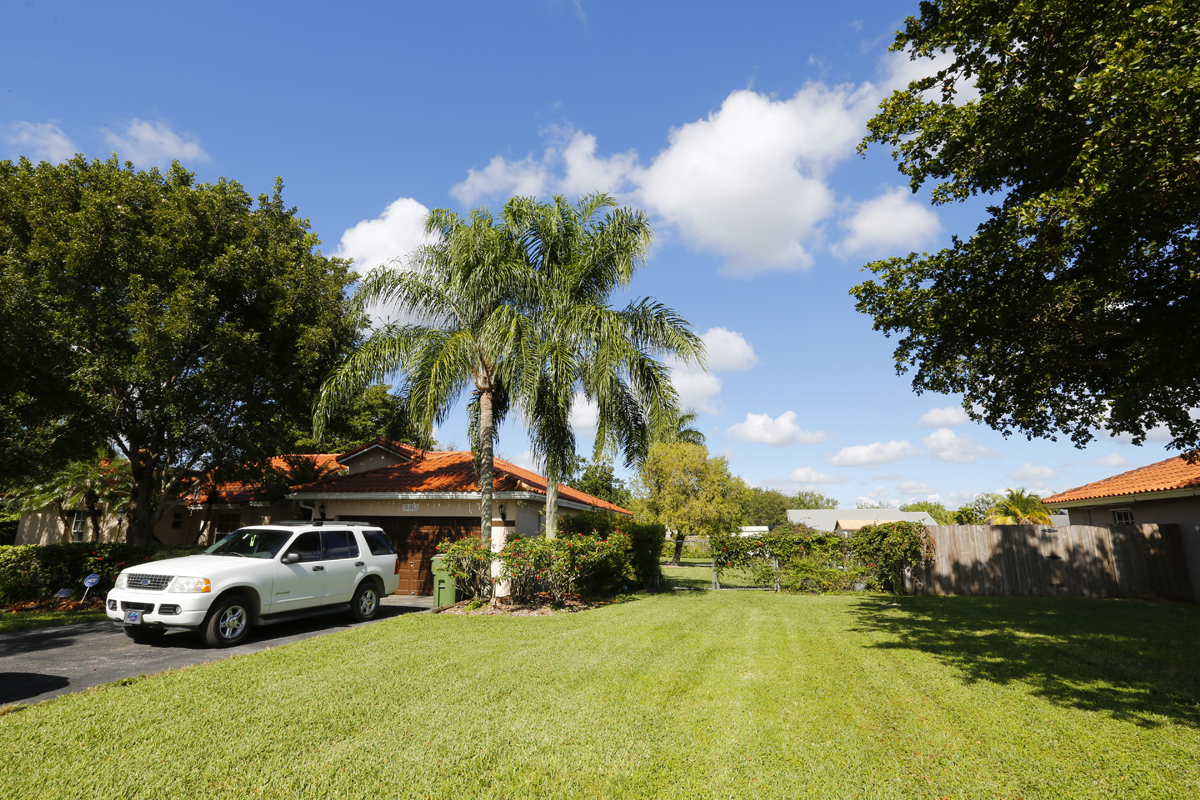
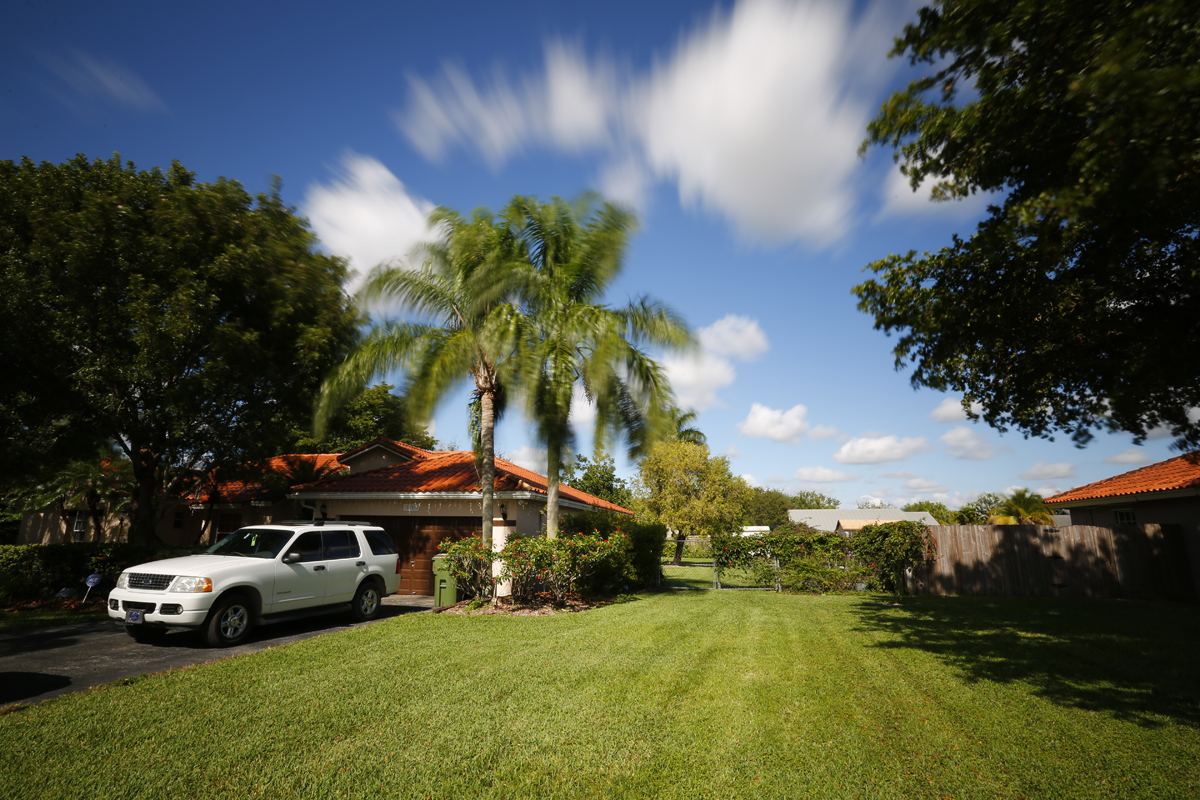
I have attached 4 images I took to test the color cast of the filter. Two of the images were taken at f/10 one with the filter and one without. The remaining two images were taken at f/22, again one with the filter an one without. In regards to color and white balance I cannot visibly see a difference between the four (4) images. The image taken with the filter at f/22 was a thirty (30) second exposure. The images were taken at around 12:30 in the afternoon with unimpeded sunlight on a windy day (thus the blurry tree branches and leaves). I used my Canon 16-35 f/2.8 ii lens.
f/10 No Filter
f/10 Haida 10 Stop Filter
f/22 No Filter
f/22 Haida 10 Stop Filter
The second issue I was concerned about was the effect that the filter would have on the sharpness of the final image. In the photography world, typically you get what you pay for. Therefore, I was concerned that a cheaper filter would use inferior glass that would ultimately degrade the image. It makes no sense to spend thousands of dollars on high quality lenses to only place low quality glass or plastic filters on the end of them. Expensive lenses plus cheap filters usually lead to subpar images.
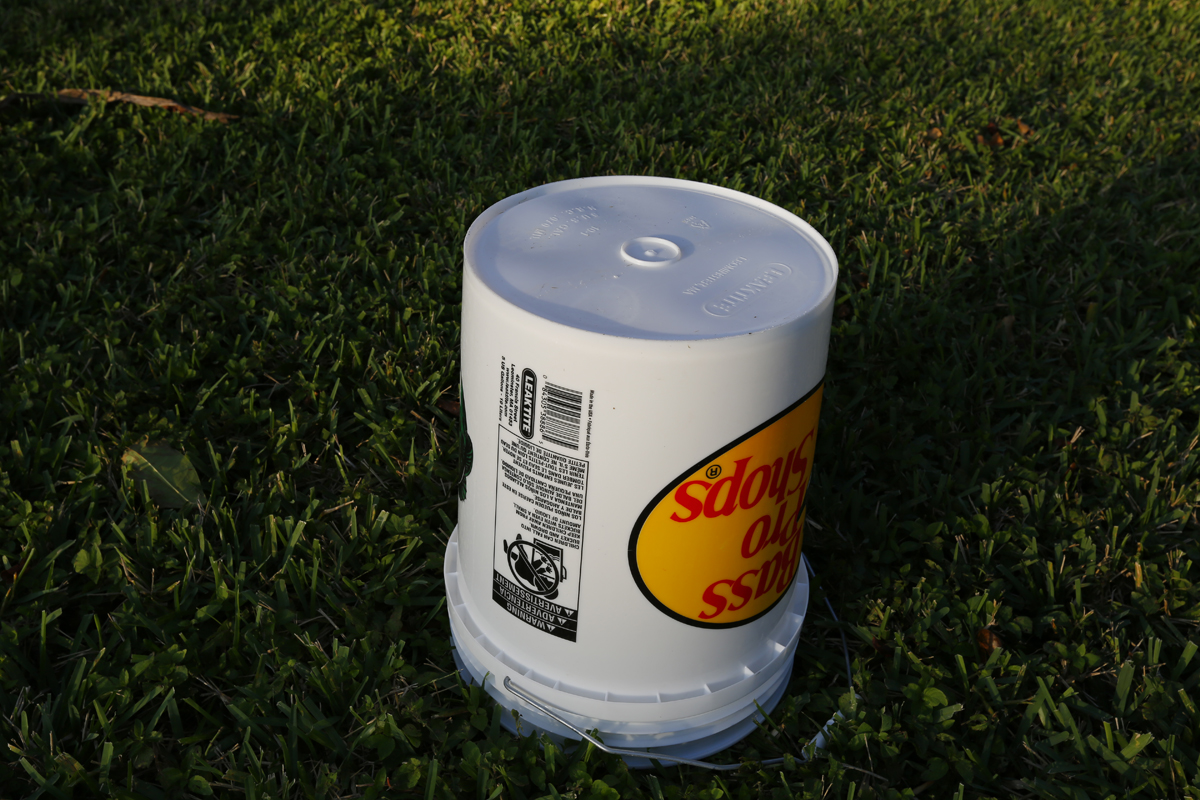
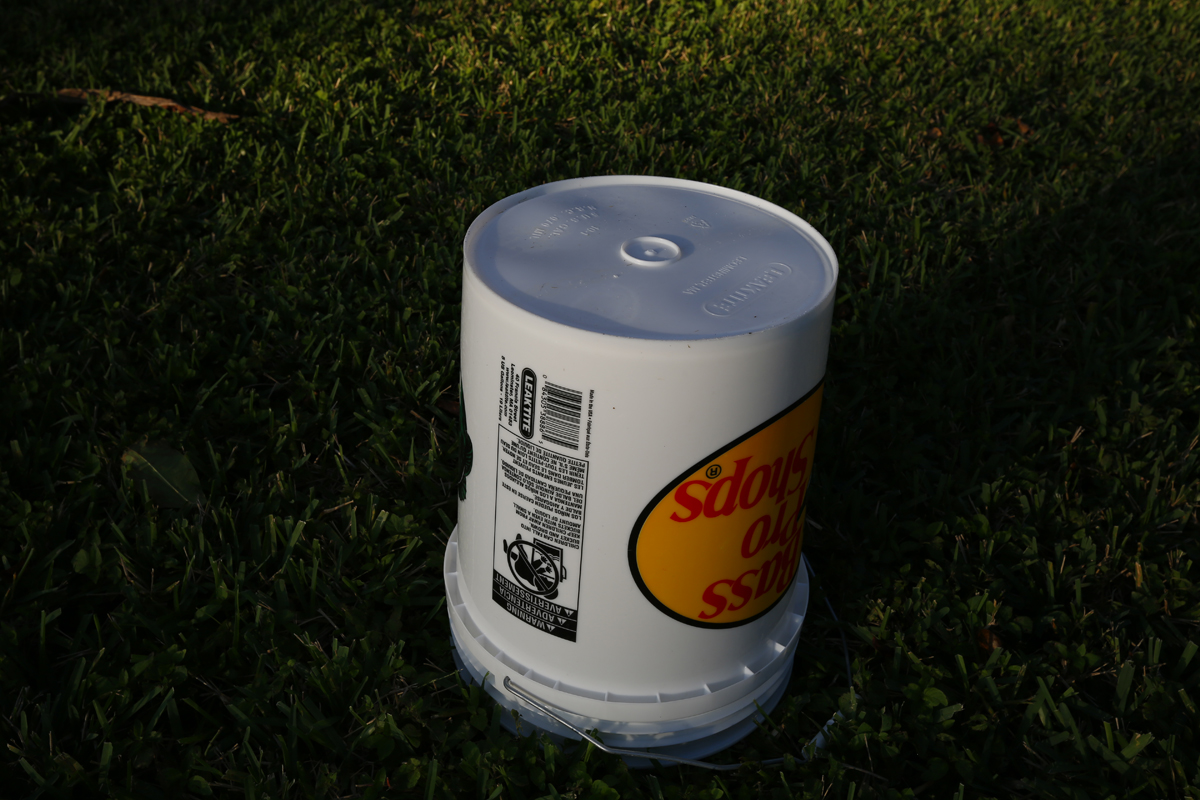
In the case of the Haida ND 10 Stop Filter, there was no effect on the final image. The images captured with the filter and without the filter were identical in terms of sharpness. I have attached 100% crops of a bucket I used as a test subject to see the effect the filter would have on the image quality. Both shots are equally sharp to the naked eye. The two shots were taken at f/11, one with the filter and one without the filter. I again used my Canon 16-35 f/2.8 ii lens. The image with the filter was a 10 second exposure.
f/11 No Filter
100% Crop No Filter
f/11 Haida 10 Stop Filter
100% Crop Haida Filter
I would highly recommend this filter to anyone looking to purchase a 10 Stop ND Filter. I researched other brands before purchasing the Haida. Many of the other well known brands had issues with color cast or the ones that did not have color cast issues were much more expensive than the cost of the Haida. The only unknown for me is the durability of the filter and will it stand up to the elements a landscape photographer like myself will expose it to. I believe the answer is yes but only time will tell. The filter feels solid in my hands. The filter ring is made from aluminum so it is also element resistant and lightweight. Even on the slim version the standard Canon lens cap will still attach to the lens with the filter on.
I purchased my filter through Amazon.com. The seller was GoShot Camera located in California. The filter arrived earlier than originally projected and was well packed.
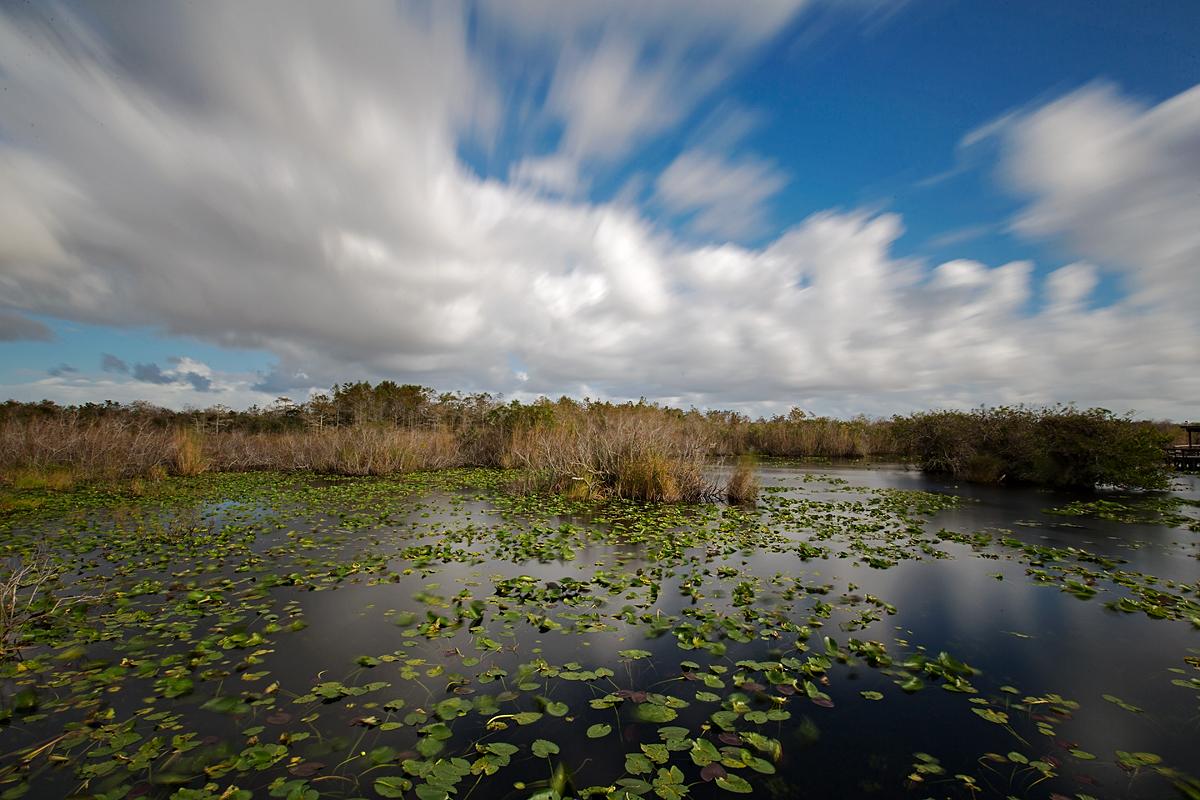
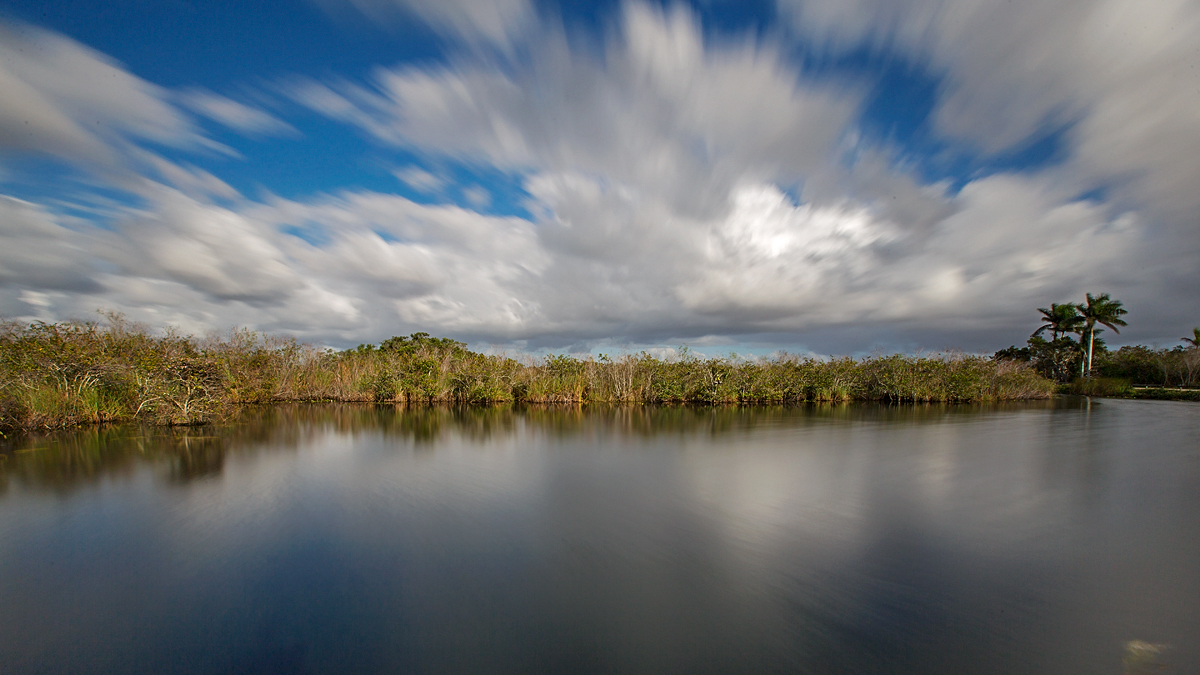
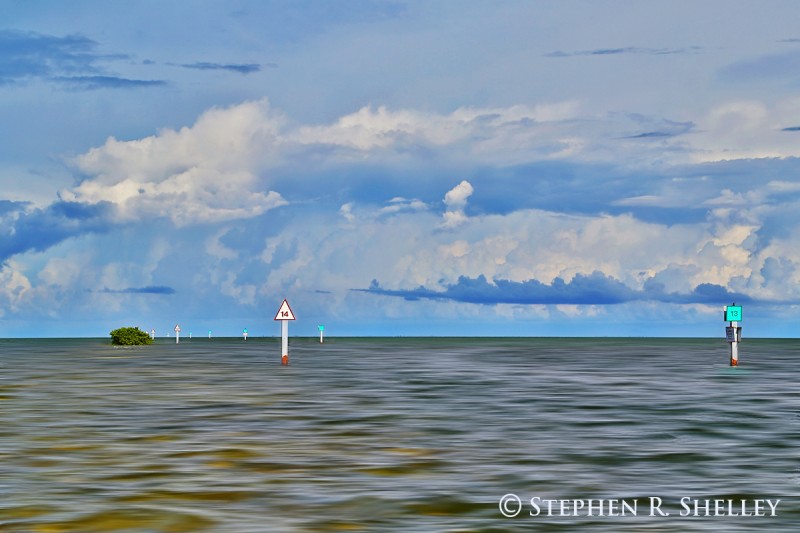
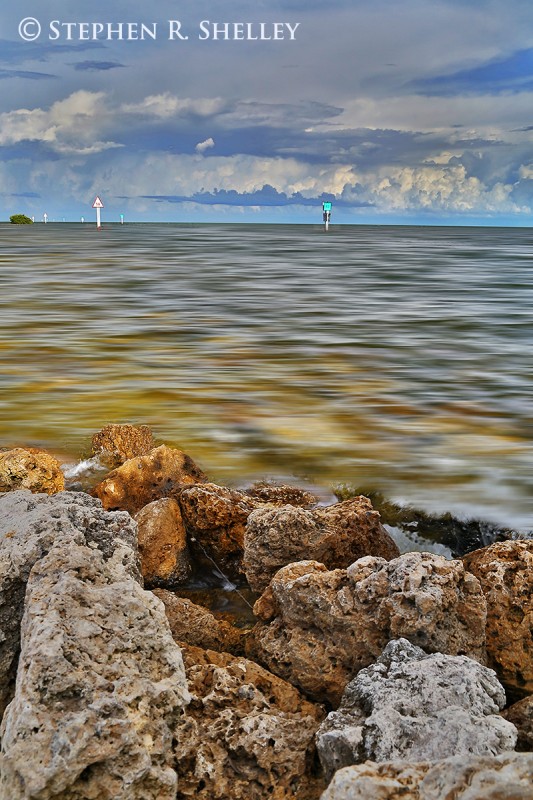
Two real world test shots taken out in Everglades National Park. It was a very windy day but the 10 Stop Filter rendered the water smooth and added motion to the clouds to give a very dull composition wise photo some interest.
10 Stop Filter Test
10 Stop Filter Test
All images in this post were straight out of the camera. Click on the thumbnails to see the full size image.
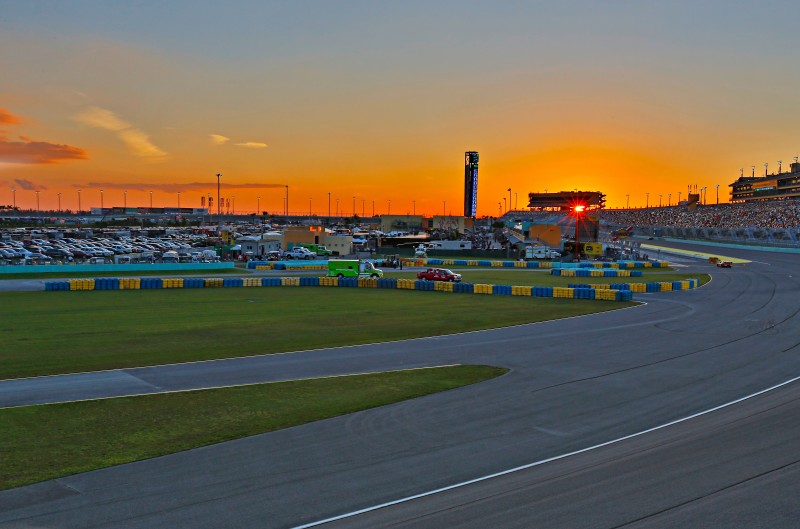
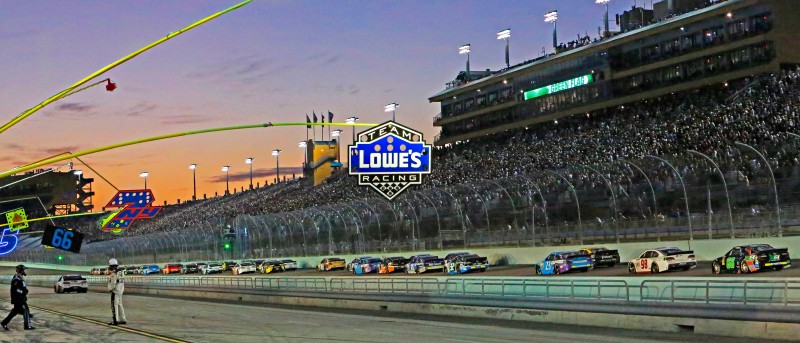
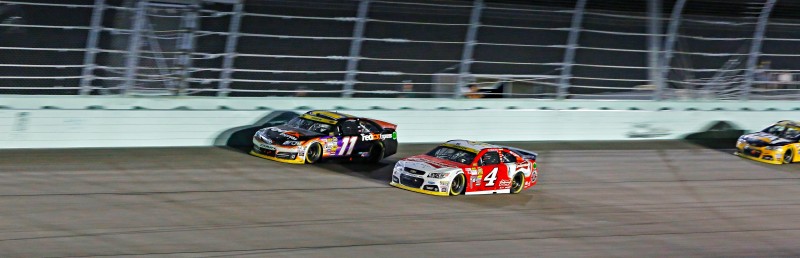
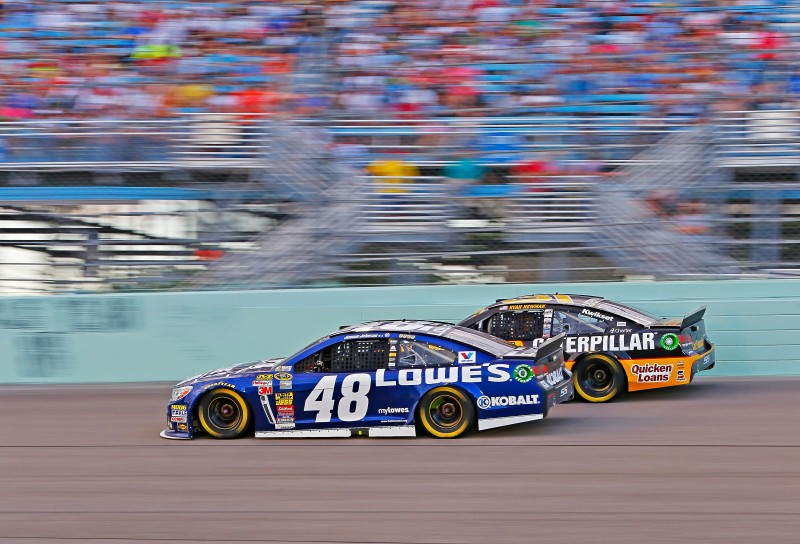
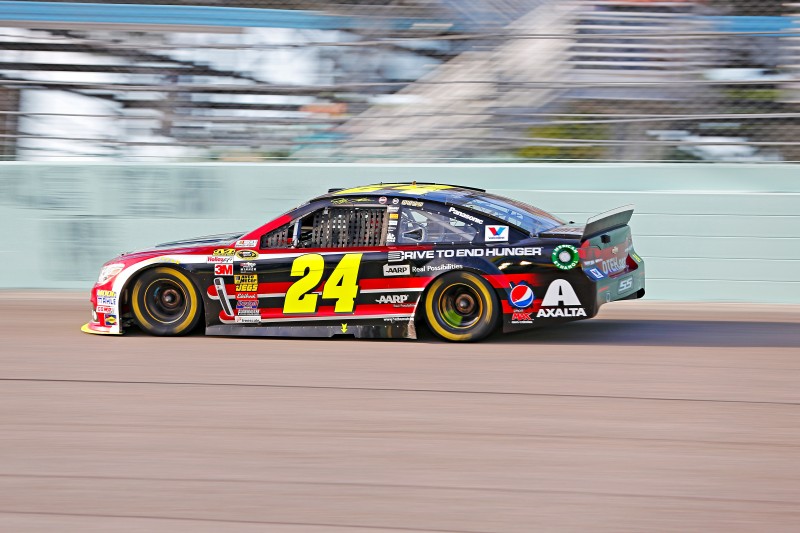
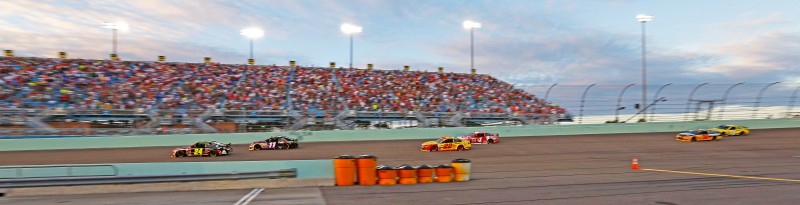
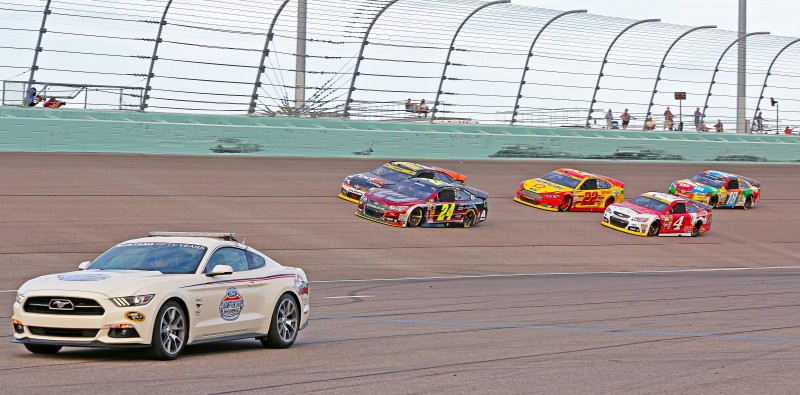
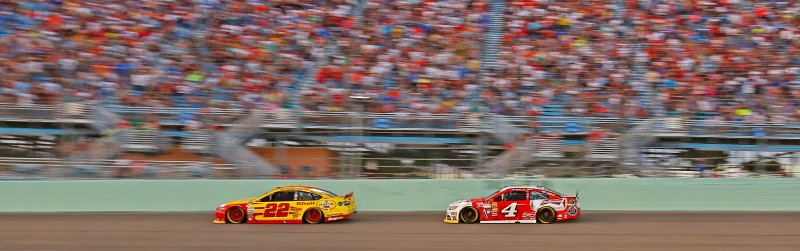
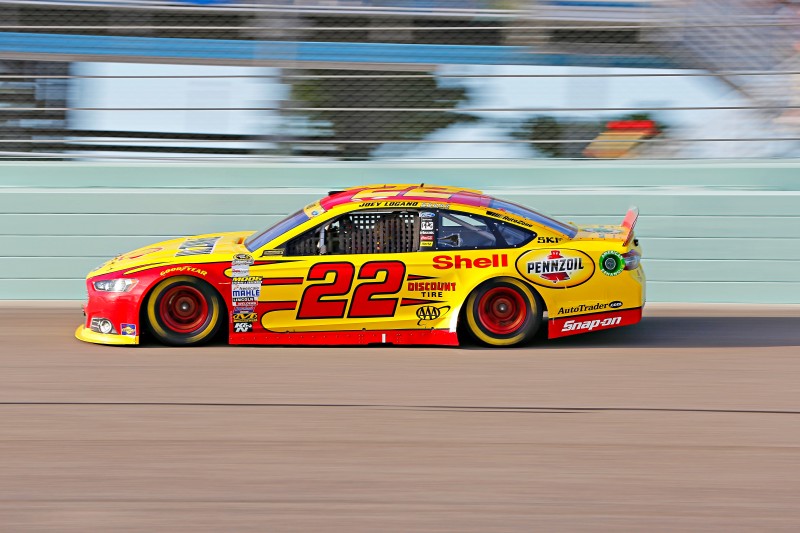
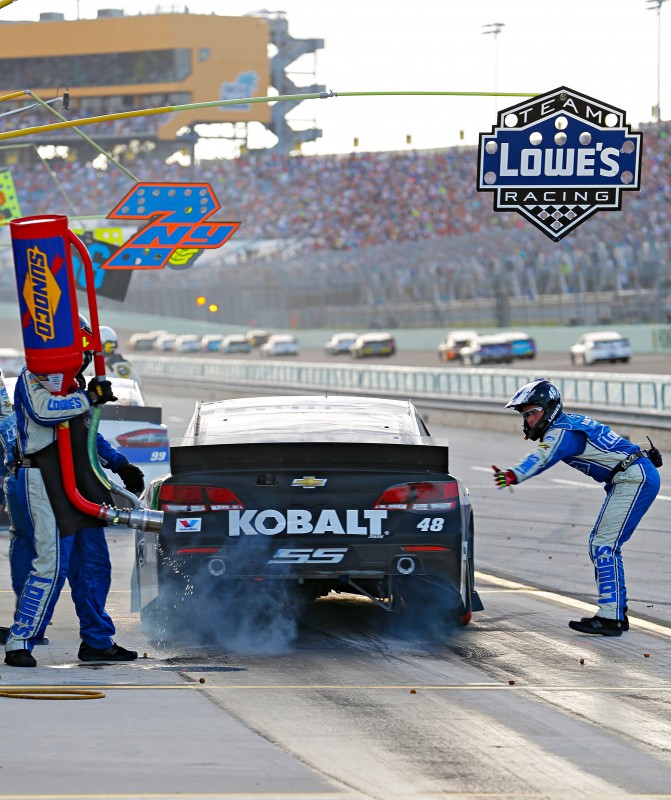
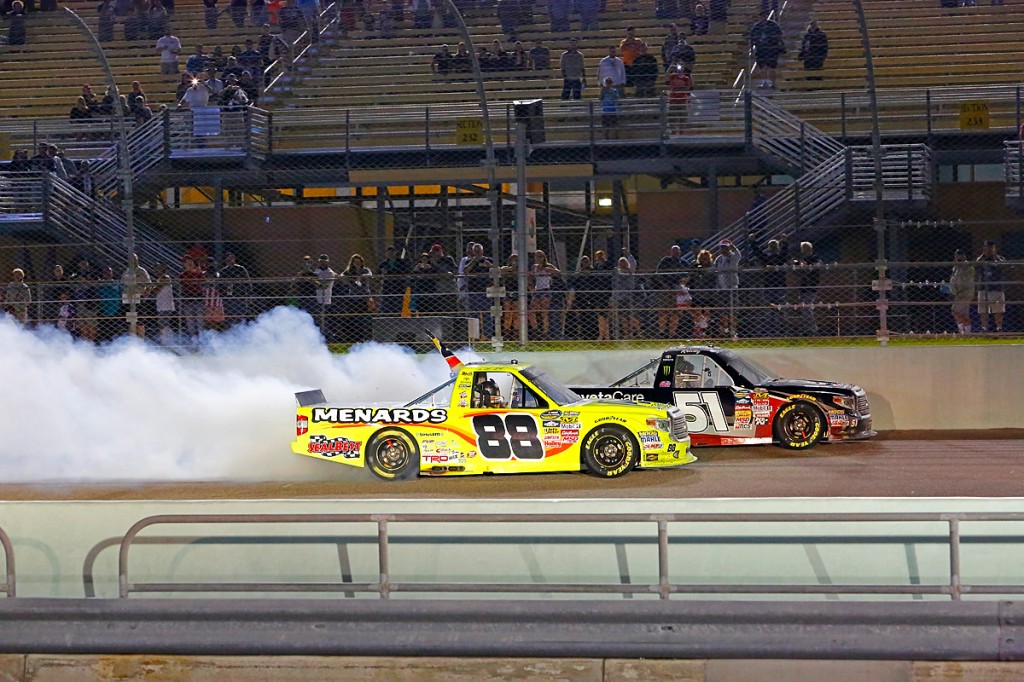
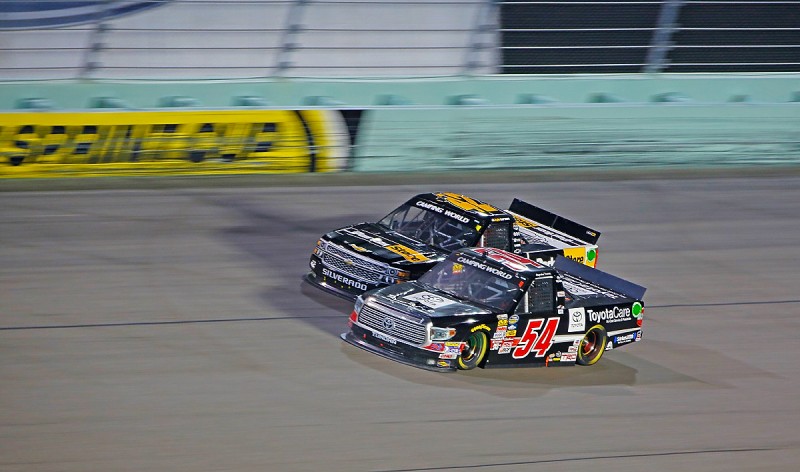
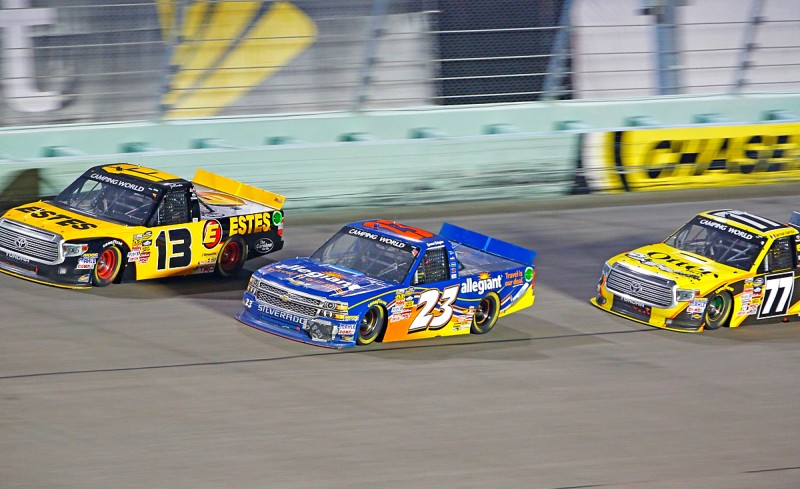
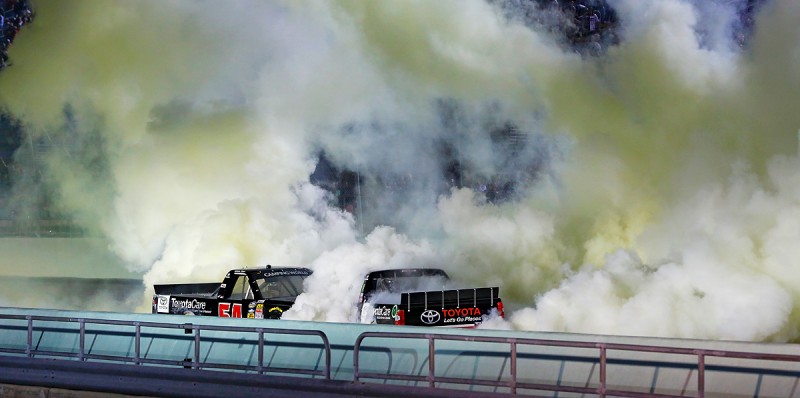
The 2014 Ford 400 Sprint Cup Championship race at Homestead-Miami Speedway was one the of the best races I have witnessed over the last 10 years at the track. There was a lot of excitement and electricity going into the final race this year and it did not disappoint. This was also the first year I was able to use my new Canon 5D Mark III camera to shoot motorsports. Compared to my old T3i it was like night and day. The autofocus was much faster and therefore easier to track the cars as they flew by at 200 mph. Also, the ability to shoot at higher ISO’s without photo degradation was also much nicer. Last year the highest I would dare shoot was 1600, this year many of my shots were 4000 and looked cleaner than last years shot at 1600. Here a few photos I captured at this years event.
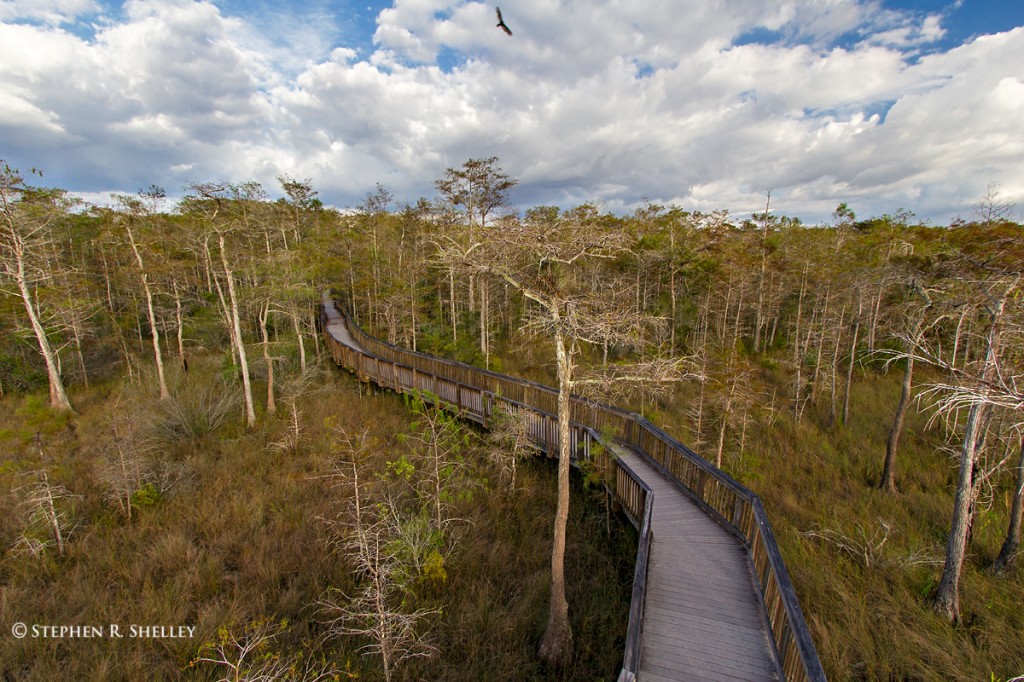
I recently decided to try something new and change my photographic perspective. How you might ask? I decided to shoot my subjects from above. While doing some research on a completely unrelated subject, I came across some photos someone had taken of a simple subject from what looked like a high vantage point. I liked the effect and thought it might be something fun to try and add a different feel to some of my images. However, it took me a while to figure out how they had captured the photo. I started researching ways to accomplish this with a camera and found information on Kites, Drones and other crazy and expensive options. And then one day, I finally found the simple answer, build a tall pole to mount my camera onto.
It turns out there are companies dedicated to the sole purpose of building tall poles that one can use to mount their camera onto. The only downside is that these poles and their accessories are not cheap usually ending up somewhere north of $350.00. I couldn’t justify spending this much money for a niche product that I was not sure I would even enjoy using. Therefore, I set out to make my own Photography Pole.
After looking at various options at hardware stores, I settled on an aluminum pool pole. Fully extended it is 16 feet high. To the end I added a 4 foot wooden dowel and then a thread to attach my camera. I now had the ability to shoot from a vantage point above the ground of 20 feet. The next question was would it be sturdy enough to capture a crisp image and more importantly would it be strong enough to keep my expensive camera and lenses from meeting an untimely destruction. Turns out the answer to both questions was yes.
Yesterday I decided to play around with my new toy and see whether or not Pole Photography was something I could put to good use. After some trial and error, I was able to figure out the elements and conditions I needed to create a unique image and captured a few images I liked. I still need to hone my skills using the pole as well as work on the logistical elements of more easily taking a picture when your camera is more than 20 feet above you. Framing, focusing and composition all become very difficult when you cannot look through the viewfinder or physically push the shutter button.
Here are few of my trial and error photos from my efforts. These images were taken in Big Cypress National Preserve.
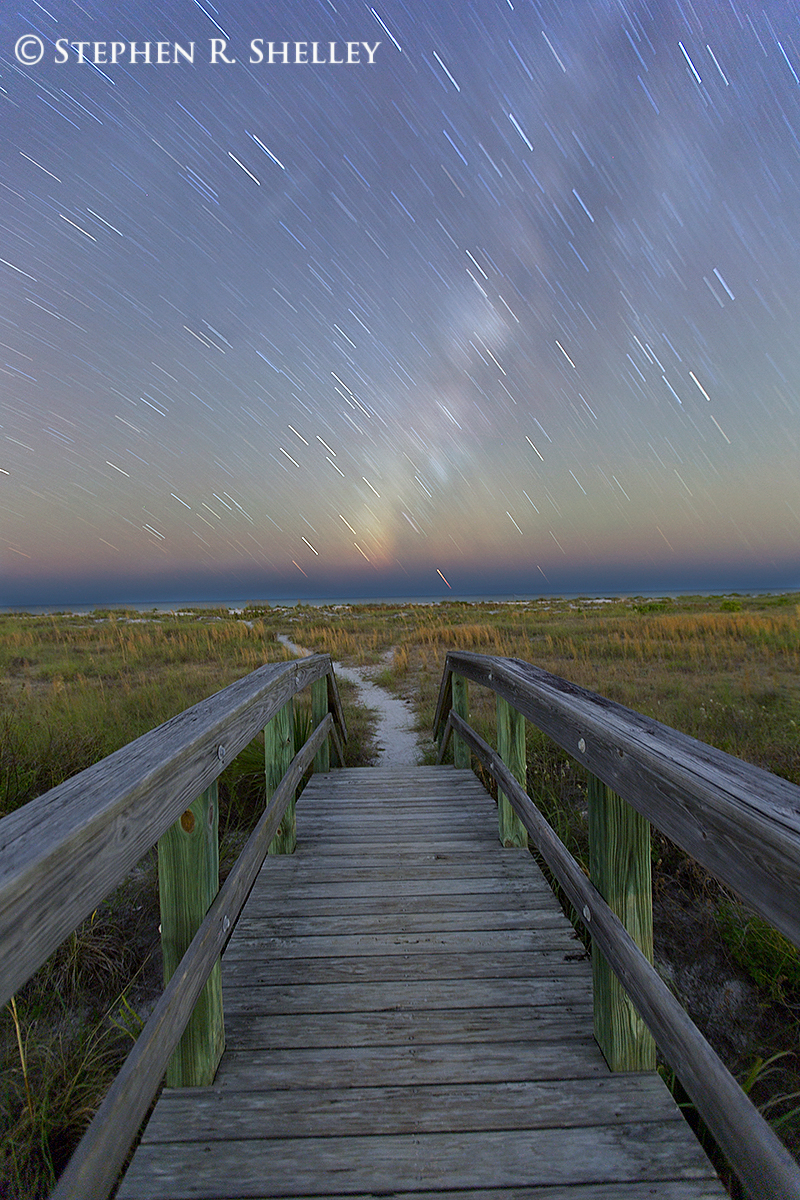
This past weekend was my wife and I’s 5th Wedding Anniversary and we decided to celebrate by getting out of town for the weekend. We opted to stay on Palm Island on the West Coast of Florida. Palm Island is a secluded island only accessible by ferry and once there all transportation is by golf cart instead of automobile. As a result, the trip was very peaceful and fairly private, only encountering a handful of people each day on the beach.
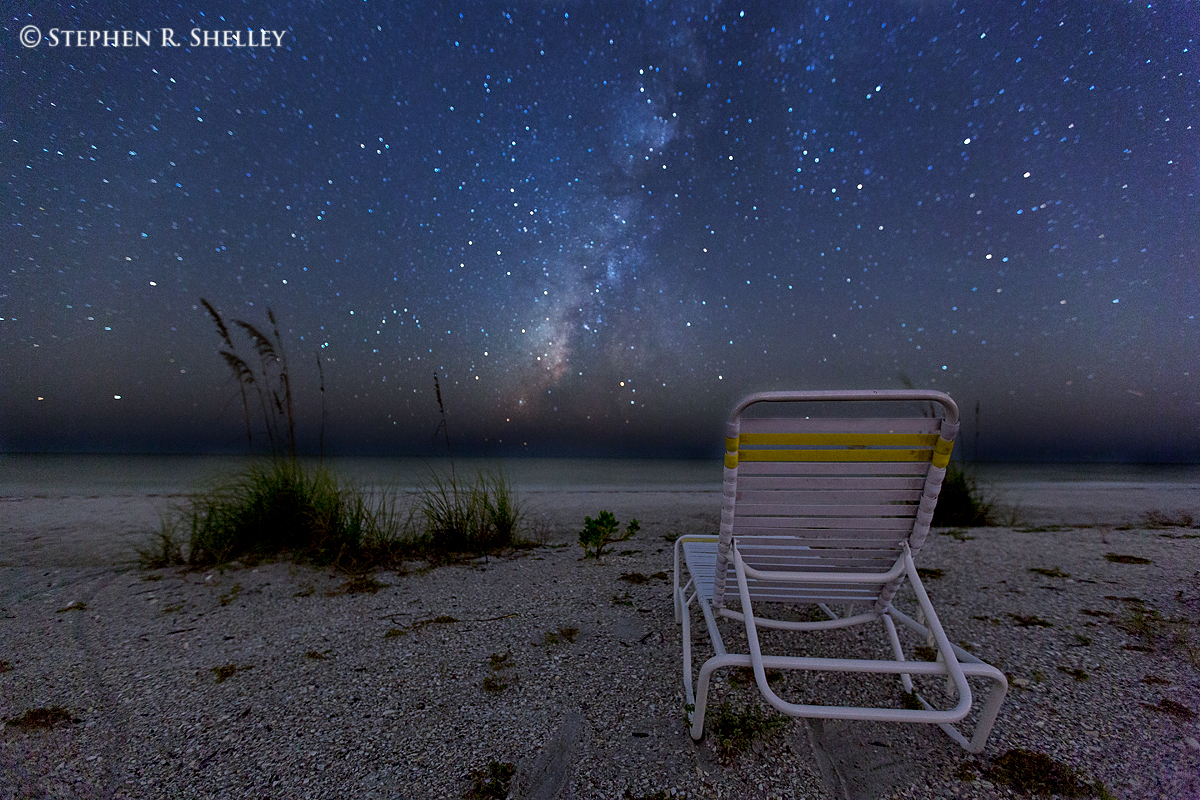
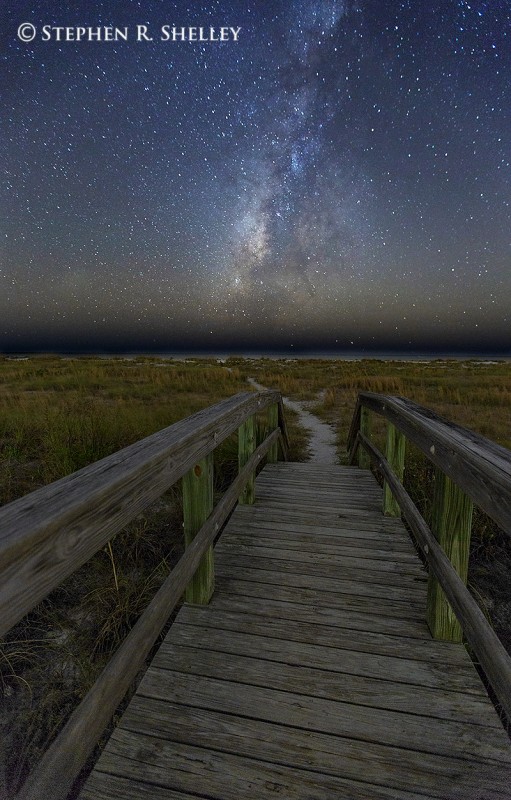
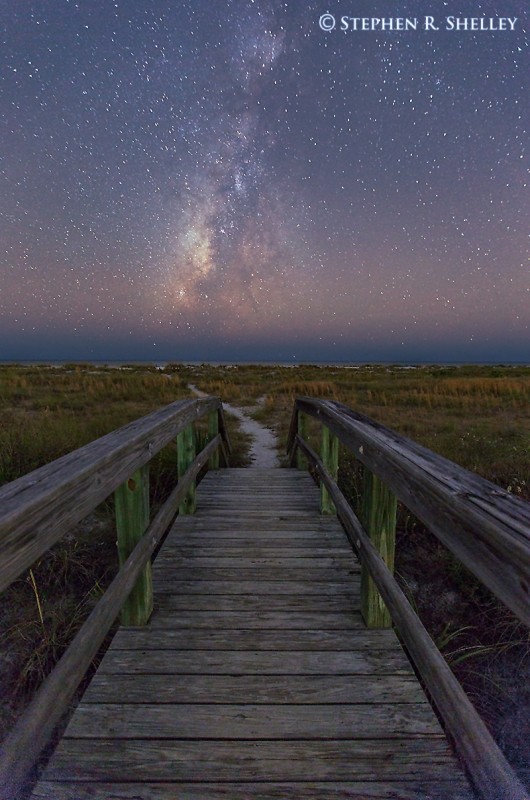
I of course brought my camera with me and envisioned grand sunsets. Unfortunately for sunset photography, but fortunately for enjoying the outdoors, a cold front came through on Friday and sinking air made for a cloudless sky. With no clouds the photos seemed flat and uninteresting. After the sunset, my wife and I took a walk down the beach to enjoy the cool weather. By the time we had started making our way back the sky had turned completely dark and to my surprise the milky way was faintly visible out over the gulf. Prior to this weekend the only time I had been able to see the milky way was when I was out in the middle of the Everglades.
I grabbed my camera and went back out to capture what I hoped were some unique shots of the milky way over the beach. I managed to capture a few images I liked.
On the beach chair photo I did not get the focus right and the beach chair is sharp and in focus but the stars and milky way are a little blurry. For the majority of the images, I tried to use the boardwalk and the pathway as a leading line taking the viewer into the scene and then connecting with the vertical milky way. For one boardwalk image I chose not to center the boardwalk to give the image more depth. I am not sure which boardwalk version I like better.
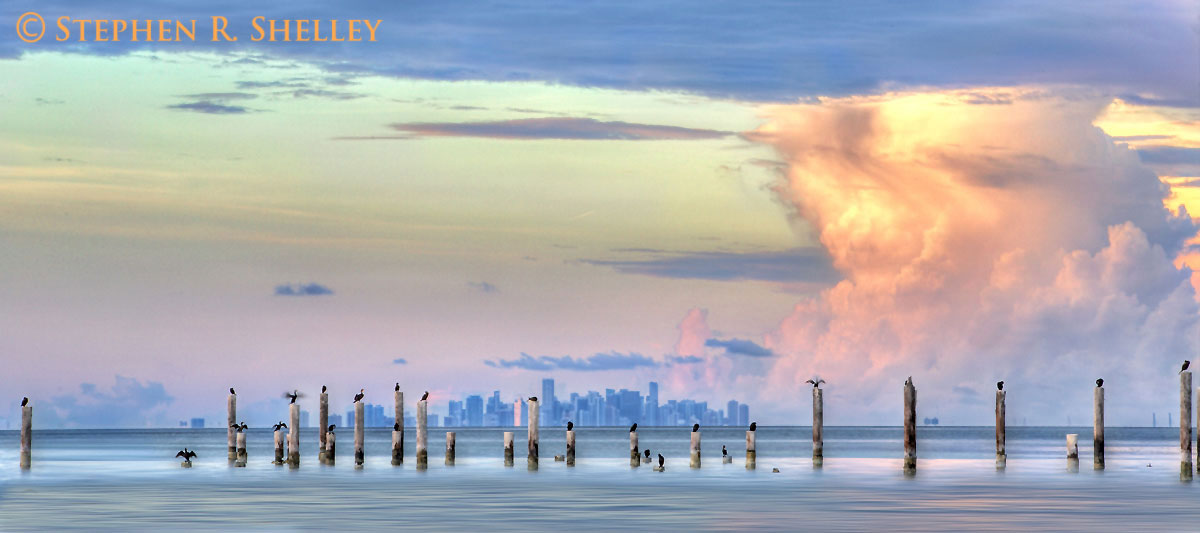
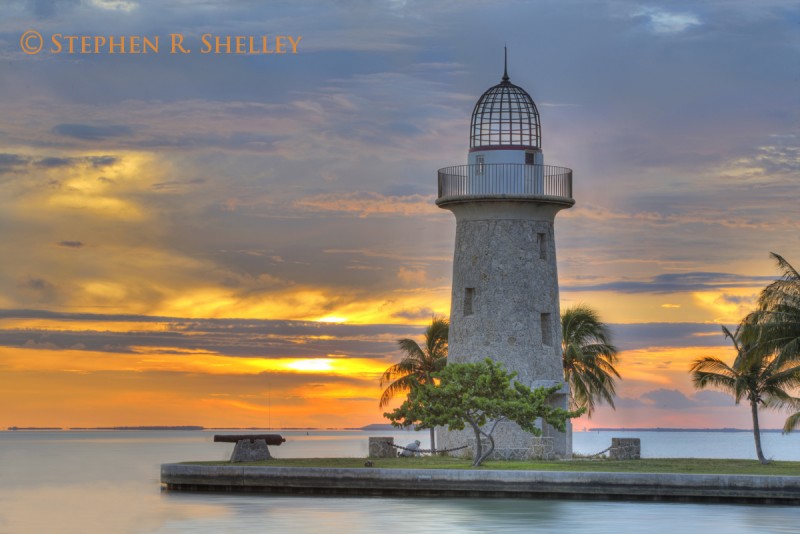
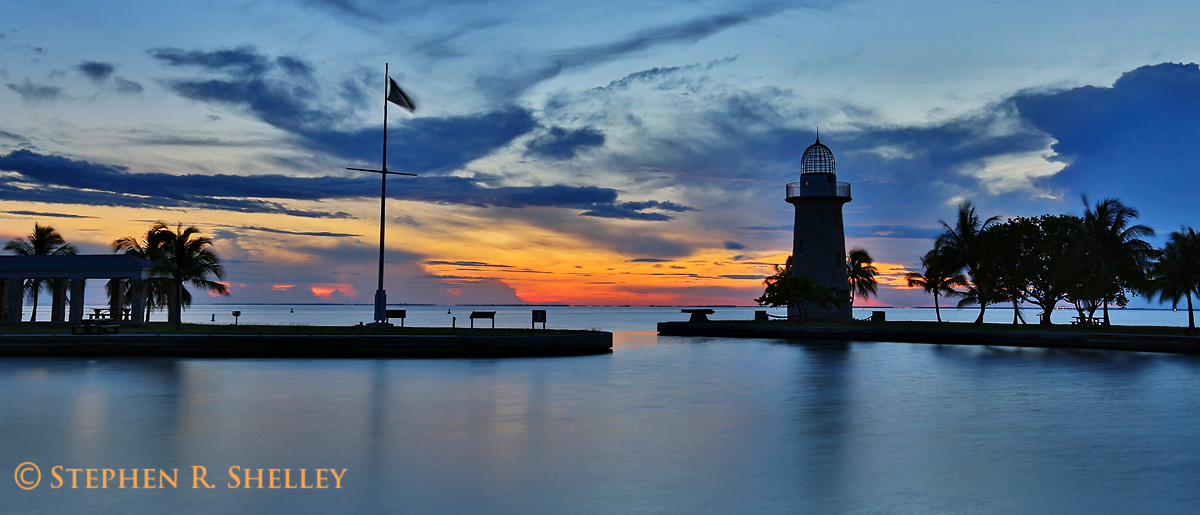
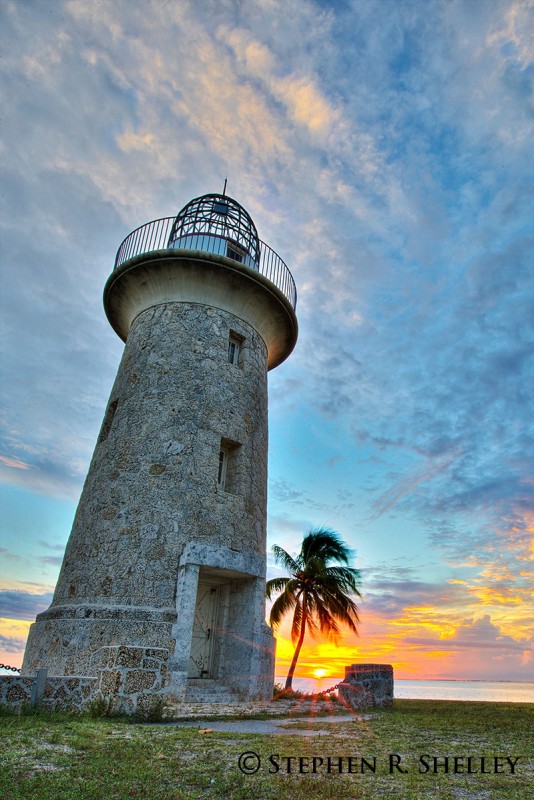
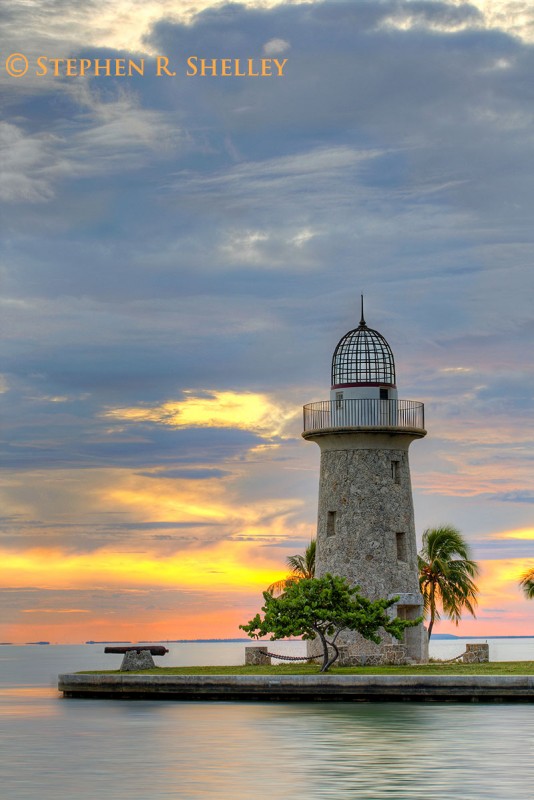
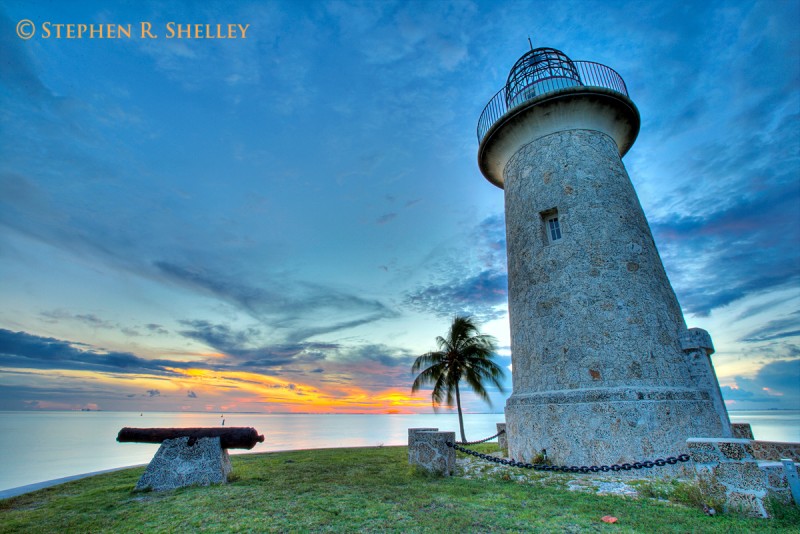
I took the opportunity this past Wednesday after work to take the boat out to Boca Chita Key. Fellow photographer friend and guide Robert Chaplin accompanied me on my most recent excursion. Boca Chita Key is located about 12 miles from Convoy Point and the Biscayne National Park visitors center.
The primary purpose of the trip was to do some scouting and hopefully capture an image of the Boca Chita Lighthouse to add to my collection. The Boca Chita Lighthouse is an iconic landmark associated with Biscayne Bay and Biscayne National Park. It was erected by a wealthy property owner of the island who essentially built an elaborate lawn ornament to mark the entrance to his island. Unfortunately, he was never allowed to turn it on by the coast guard as the island is surrounded by shallow grass flats and it could have been a danger to local mariners. After the formation of Biscayne National Park, the island and the historic structures were acquired and are now available for public enjoyment. You can only reach Boca Chita Key by boat, but once there you can camp, swim and enjoy the beautiful views of Biscayne Bay, the Atlantic Ocean and the distant Downtown Miami Skyline.
On this trip I managed to capture some decent images of the lighthouse with a very vibrant sunset in the background as well as building thunderstorm over Downtown Miami. It turned out to be a great evening to make the trip. There were calm winds and waves and some very dramatic clouds from thunderstorms that had passed through earlier in the day. However, the saltwater mosquitoes were out in force and were as bad if not worse than the swarms I am used to experiencing in Everglades National Park.
I don’t spend as much time in Biscayne National Park as I should. This is primarily because most of Biscayne National Park is water and the number of boat access points is limited. Additionally, dealing with the weekend crowds at the boat ramps is just not worth the hassle. However, I am making it a point to spend more time in this beautiful park and try to capture more of its uniqueness in my photographs.
To get the ball rolling I drove out to the Biscayne National Park visitor center after work to capture some incoming storms and what I hoped were some dramatic skies. I captured a few images I liked but nothing spectacular. The mainland portion of the park closes at 5:30 so I had to leave just as the light was starting to reach its peak. I may try to capture an early morning sunrise before work next time.
Here are a few of the images from my 30 minute trip
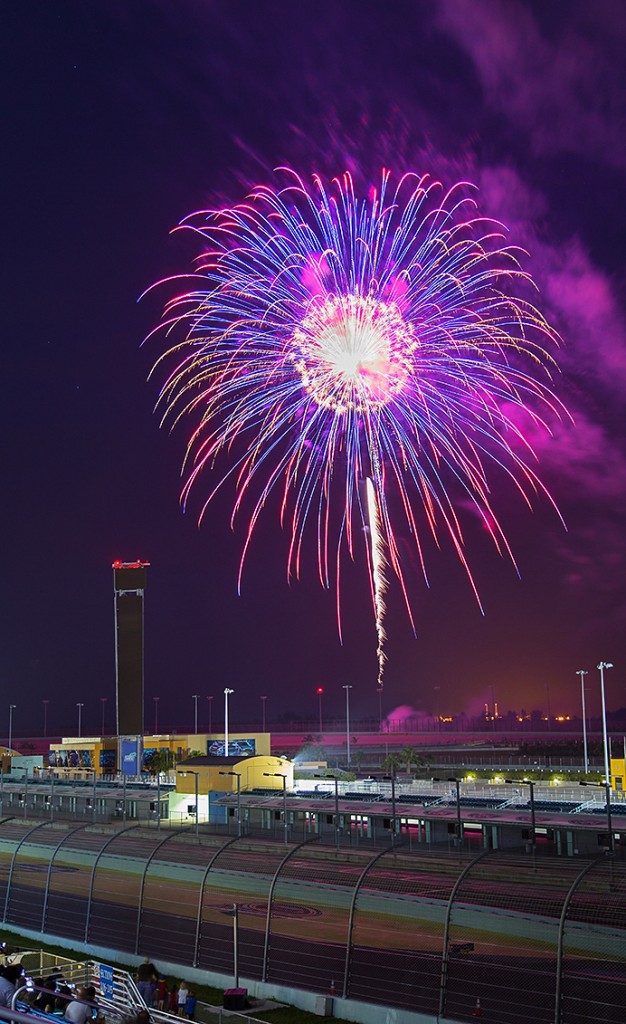
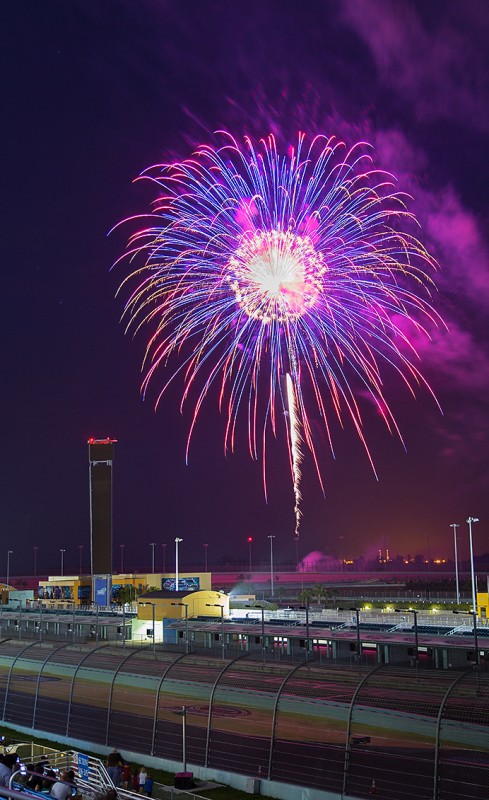
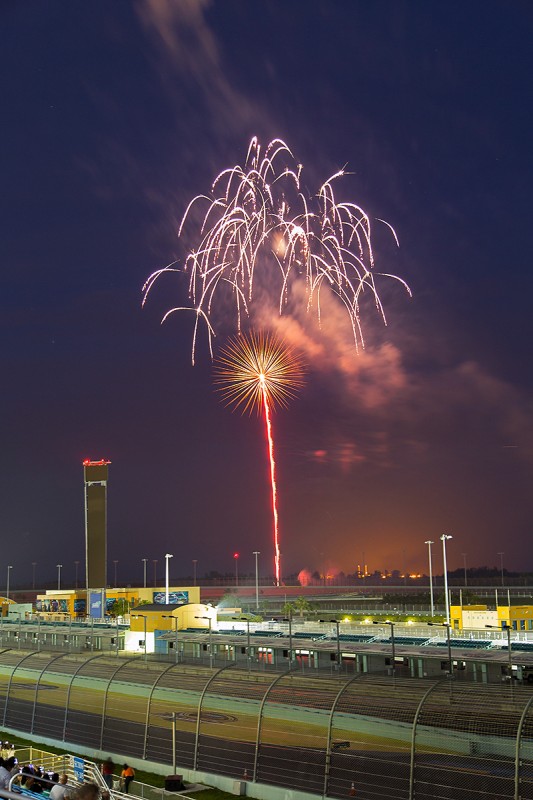
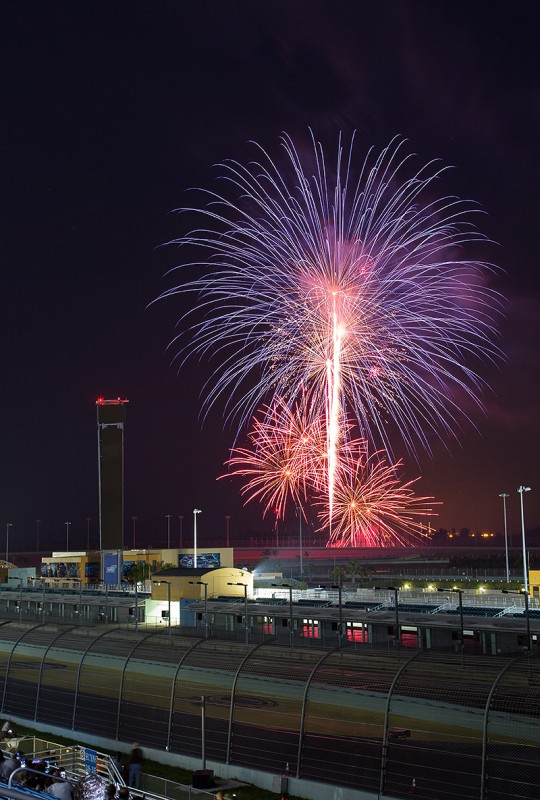
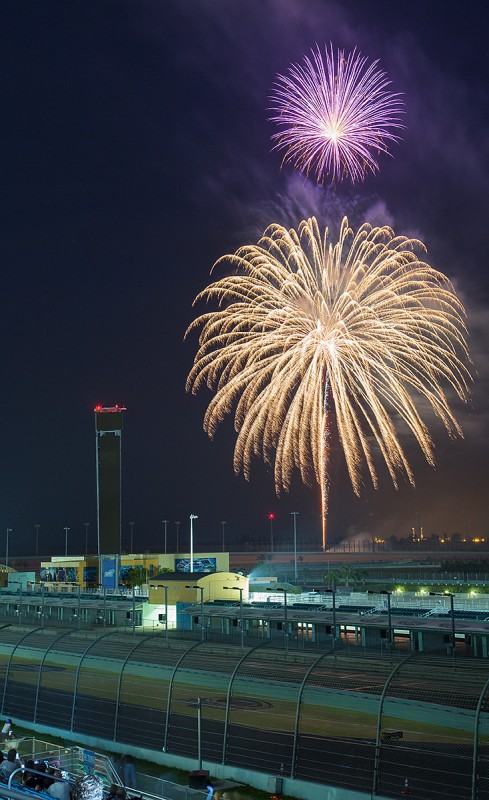
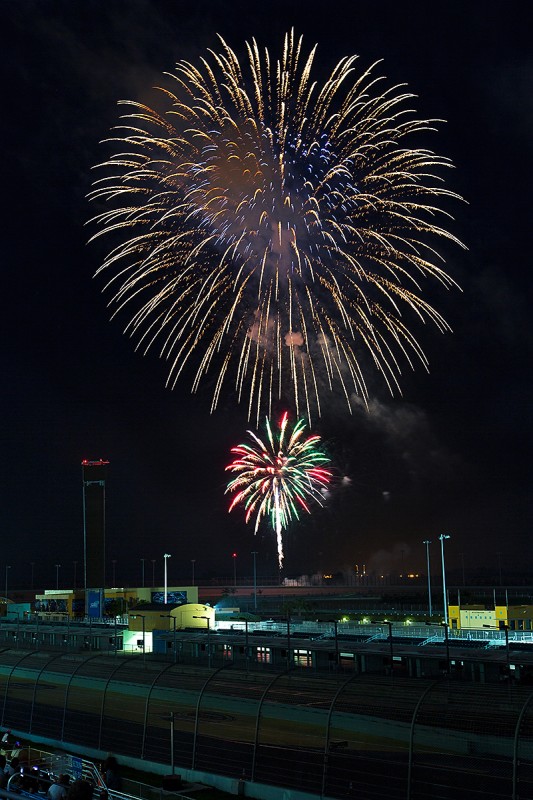
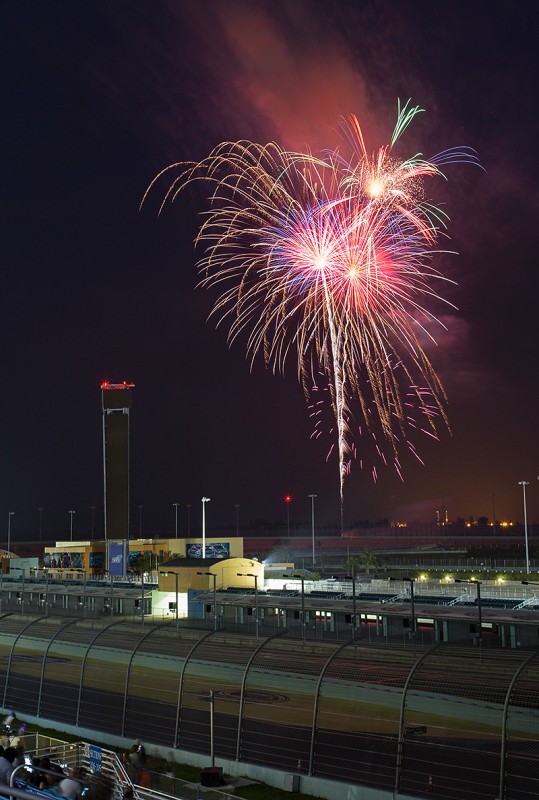
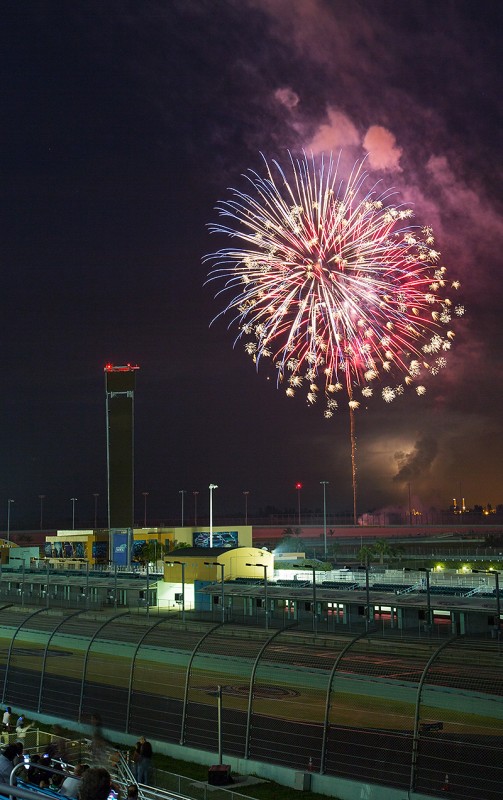
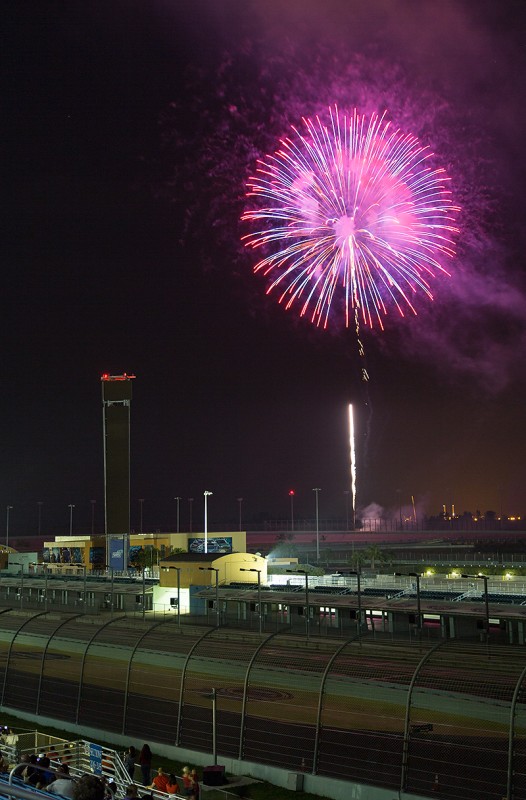
I brought my camera to this years 4th of July celebration of Homestead Miami Speedway in hopes of finding time to photograph the fireworks display. I have brought my camera the last 3 years but have yet to find time to use it. One downfall of being an elected official on the 4th of July is that you always end up being part of the programming. The last few years the program has occurred right before the fireworks have started leaving me no time to grab my camera and tripod and get to a good vantage point.
This year however the program concluded early enough to head outside and set up my camera to watch the show. This years fireworks were great and the City of Homestead Parks and Rec Staff did not disappoint. It took me a little while to get my settings right, and in the end I still did not figure out exactly the best method to capture the explosions, but still managed to get a few keepers.
My biggest problem was that I was so close to the fireworks it was hard to set my aperture and shutter speed correctly so as not to get blowouts to frequently. This was especially true during the grand finally in which I did not successfully capture a single usable shot. I will research the techniques better next year before trying it again.
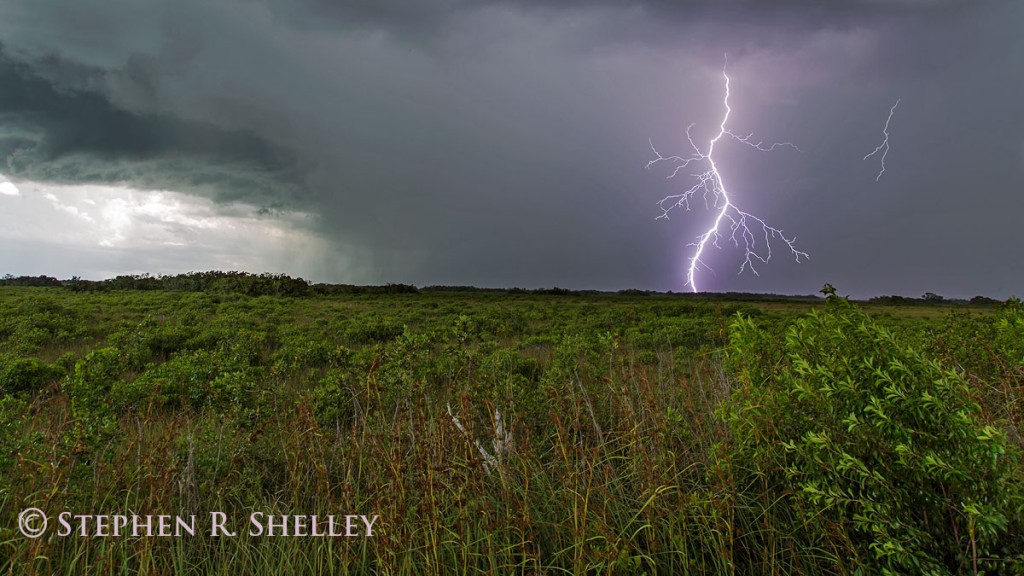
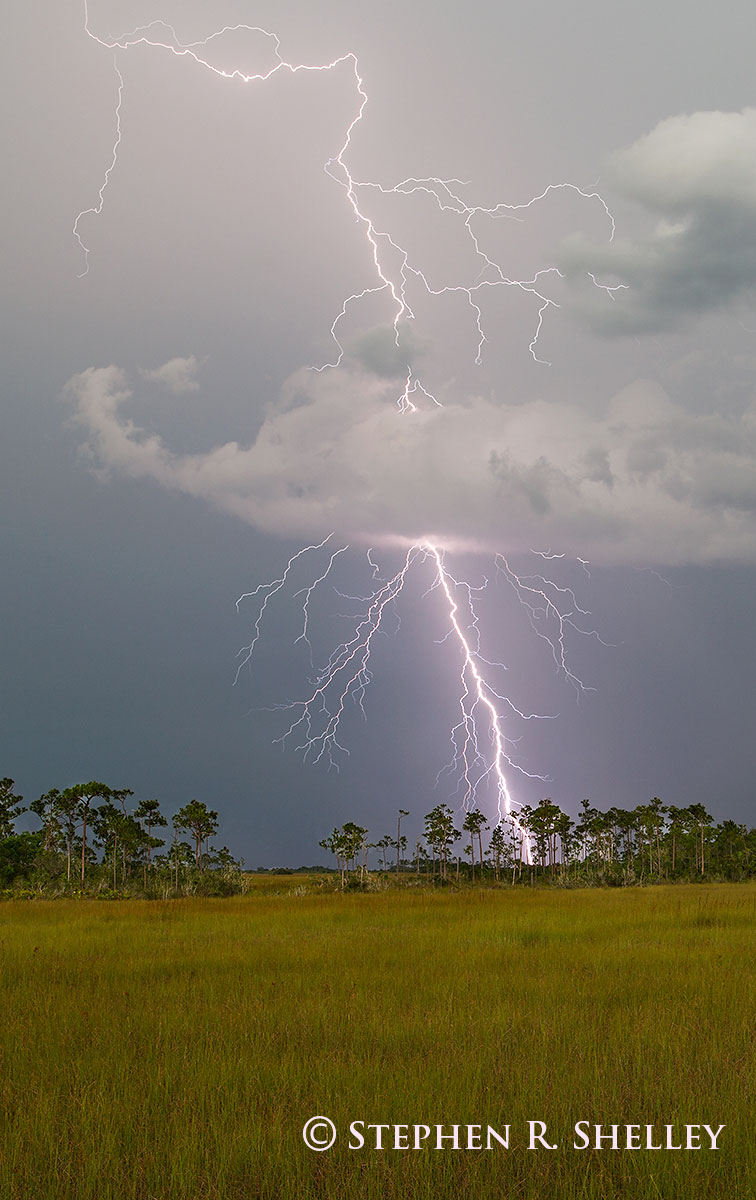
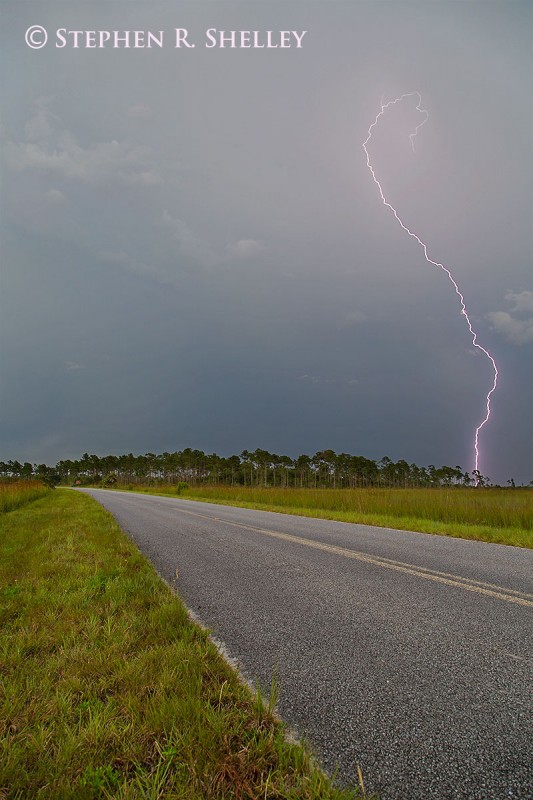
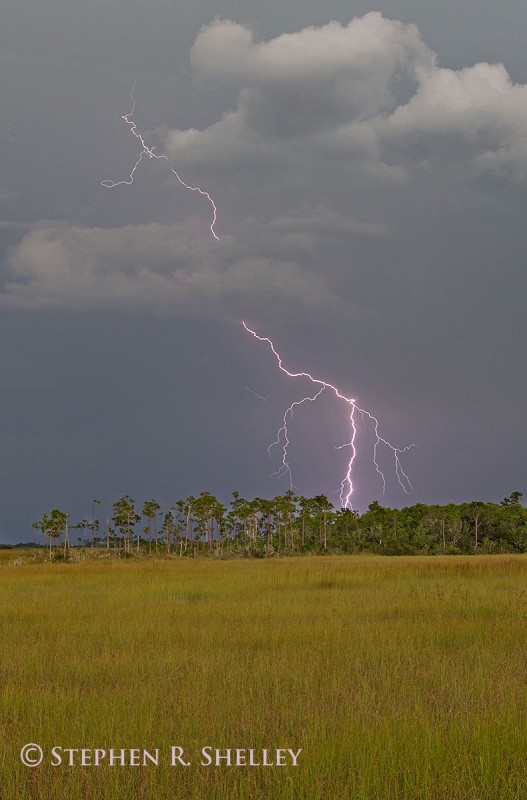
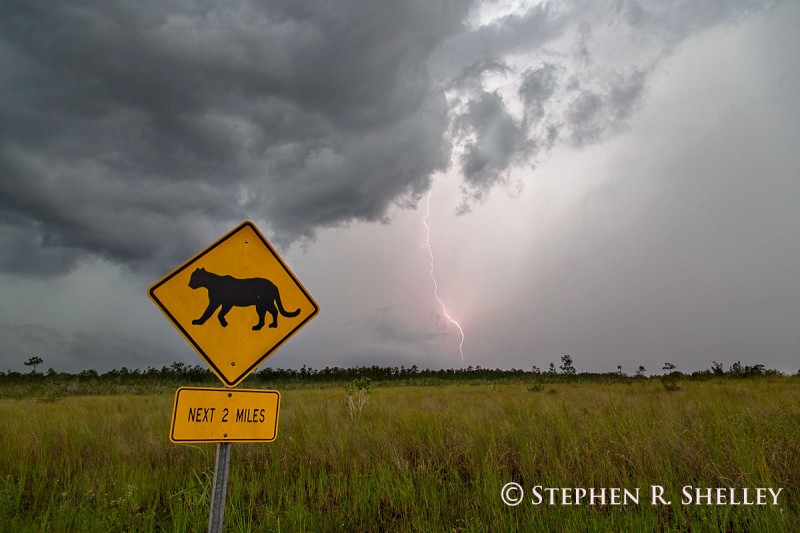
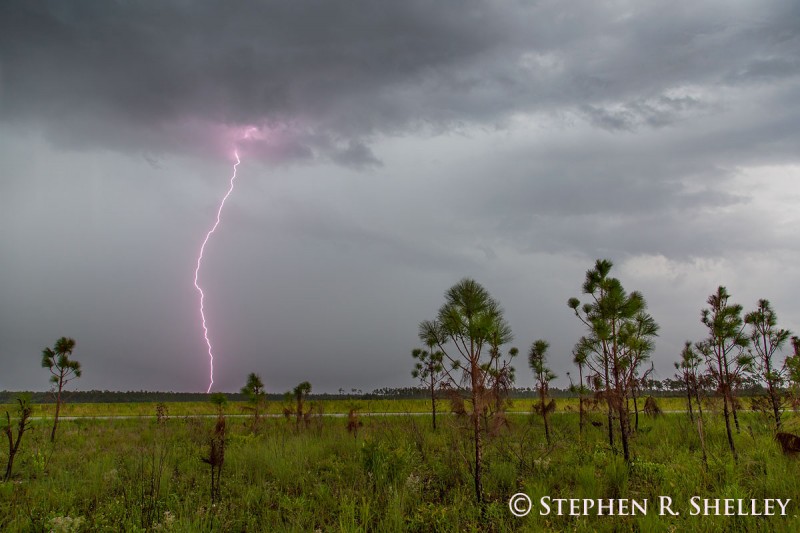
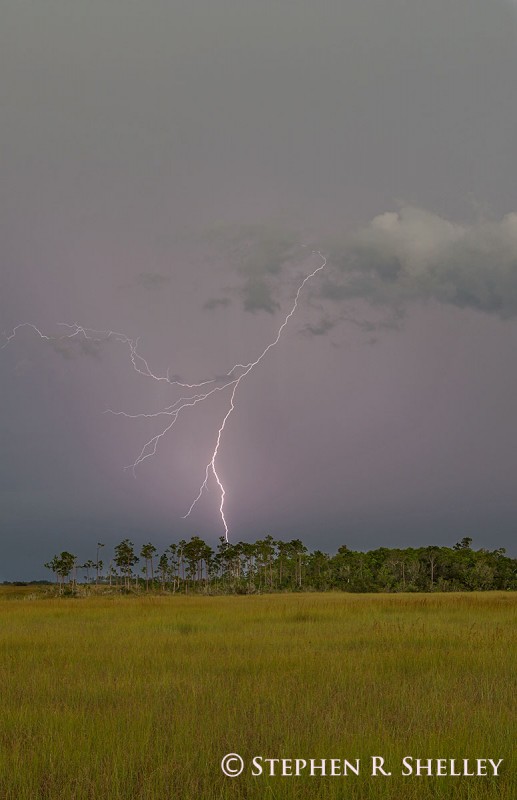
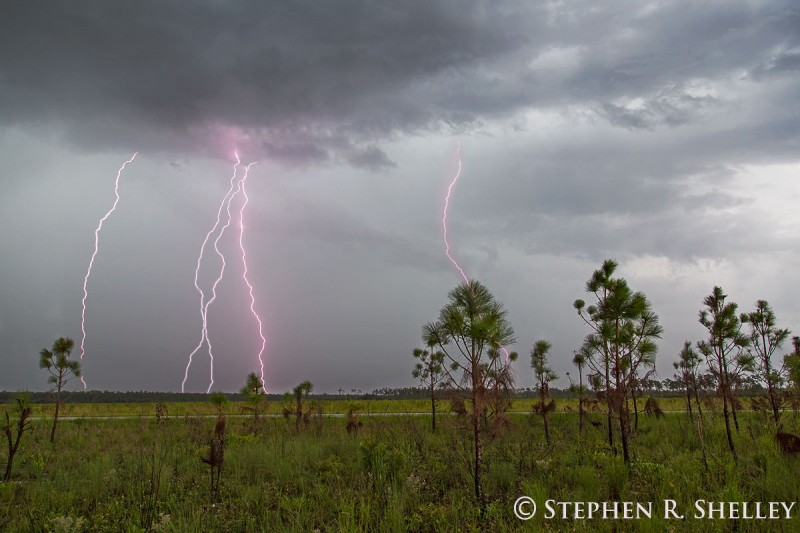
We have been having a very wet and stormy year here in Southeast Florida. I decided to try and take advantage of the weather pattern to go out and capture one of my favorite subject matters, Lightning. Each year I have committed to dedicate some free time to chase storms and create a lightning portfolio. Unfortunately, every year something important occurs on the best storm/lightning days or nights. At least this year I was able to spend a whole day chasing storms and as a result got some exciting lighting images to add to my collection.
I chased these storms from the entrance to Everglades National Park all the way to Flamingo. A few times I probably got a little closer than I should have. During one of the storms I could not get out of the truck because the lighting was almost directly overhead. The bolt and thunder were occurring simultaneously.